What is RAW?: Part 1
When you take a photo with your fancy digital camera, the shutter opens and light is captured at the blink of an eye (or faster).
Later on you take out the memory card and look over all the wonderful photos you've taken, beautifully-rendered with attractive colours.
But maybe some photos came out too dark or too bright and you want to adjust them. You find that you cannot quite fix them, your JPEG image holding you back.
So then you get all into a Lightroom subscription and flip the switch to shoot in RAW instead of JPEG.
You now have way more room for adjusting the photo... But what is RAW anyway? And why is it sometimes called a digital negative?
Stepping back in time
Before digital, we had film photography.
When you take a photo with your vintage film camera, the shutter opens and light is captured at the blink of an eye (this part is the same!).
When you finish up the roll of film, you need to roll it back to avoid exposing it to the light, and drop it off at the lab. After some time, you get your prints/scans back and marvel at the filmic beauty.
But what actually happens in between? And how does this relate to RAW format digital photos?
The most important thing to consider is that the image that you see at the end of the process, is actually not what the camera captures straight away.
Human vision, and the way it responds to light waves, is not a perfect capture of reality.
Of course, neither is a camera sensor or film stock.
The entire process of developing a photo is in fact filled with subjective decisions about what looks pleasant/natural when a person sees it.
Let's take a developed roll of negative film, and see what we get.
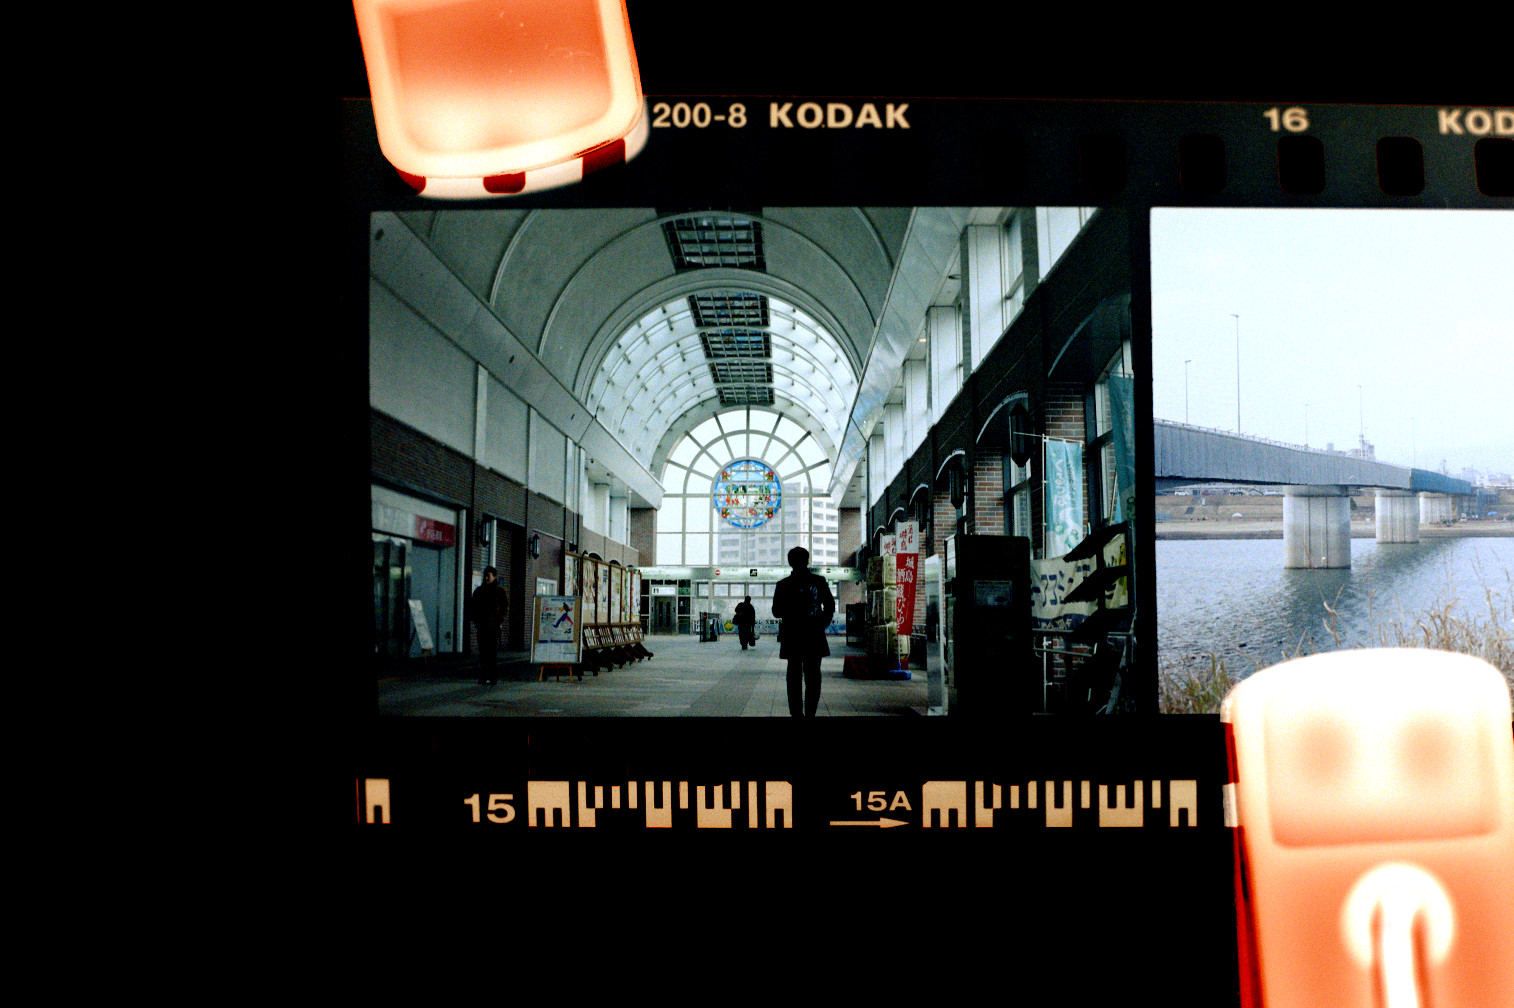
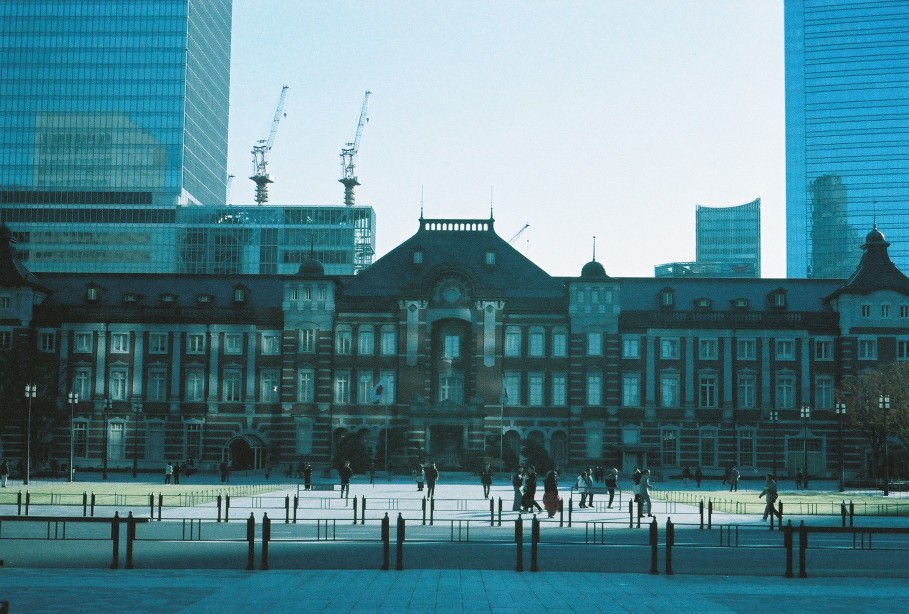
Here is a finished lab scan of the photo, as well as a look at the film negative itself.
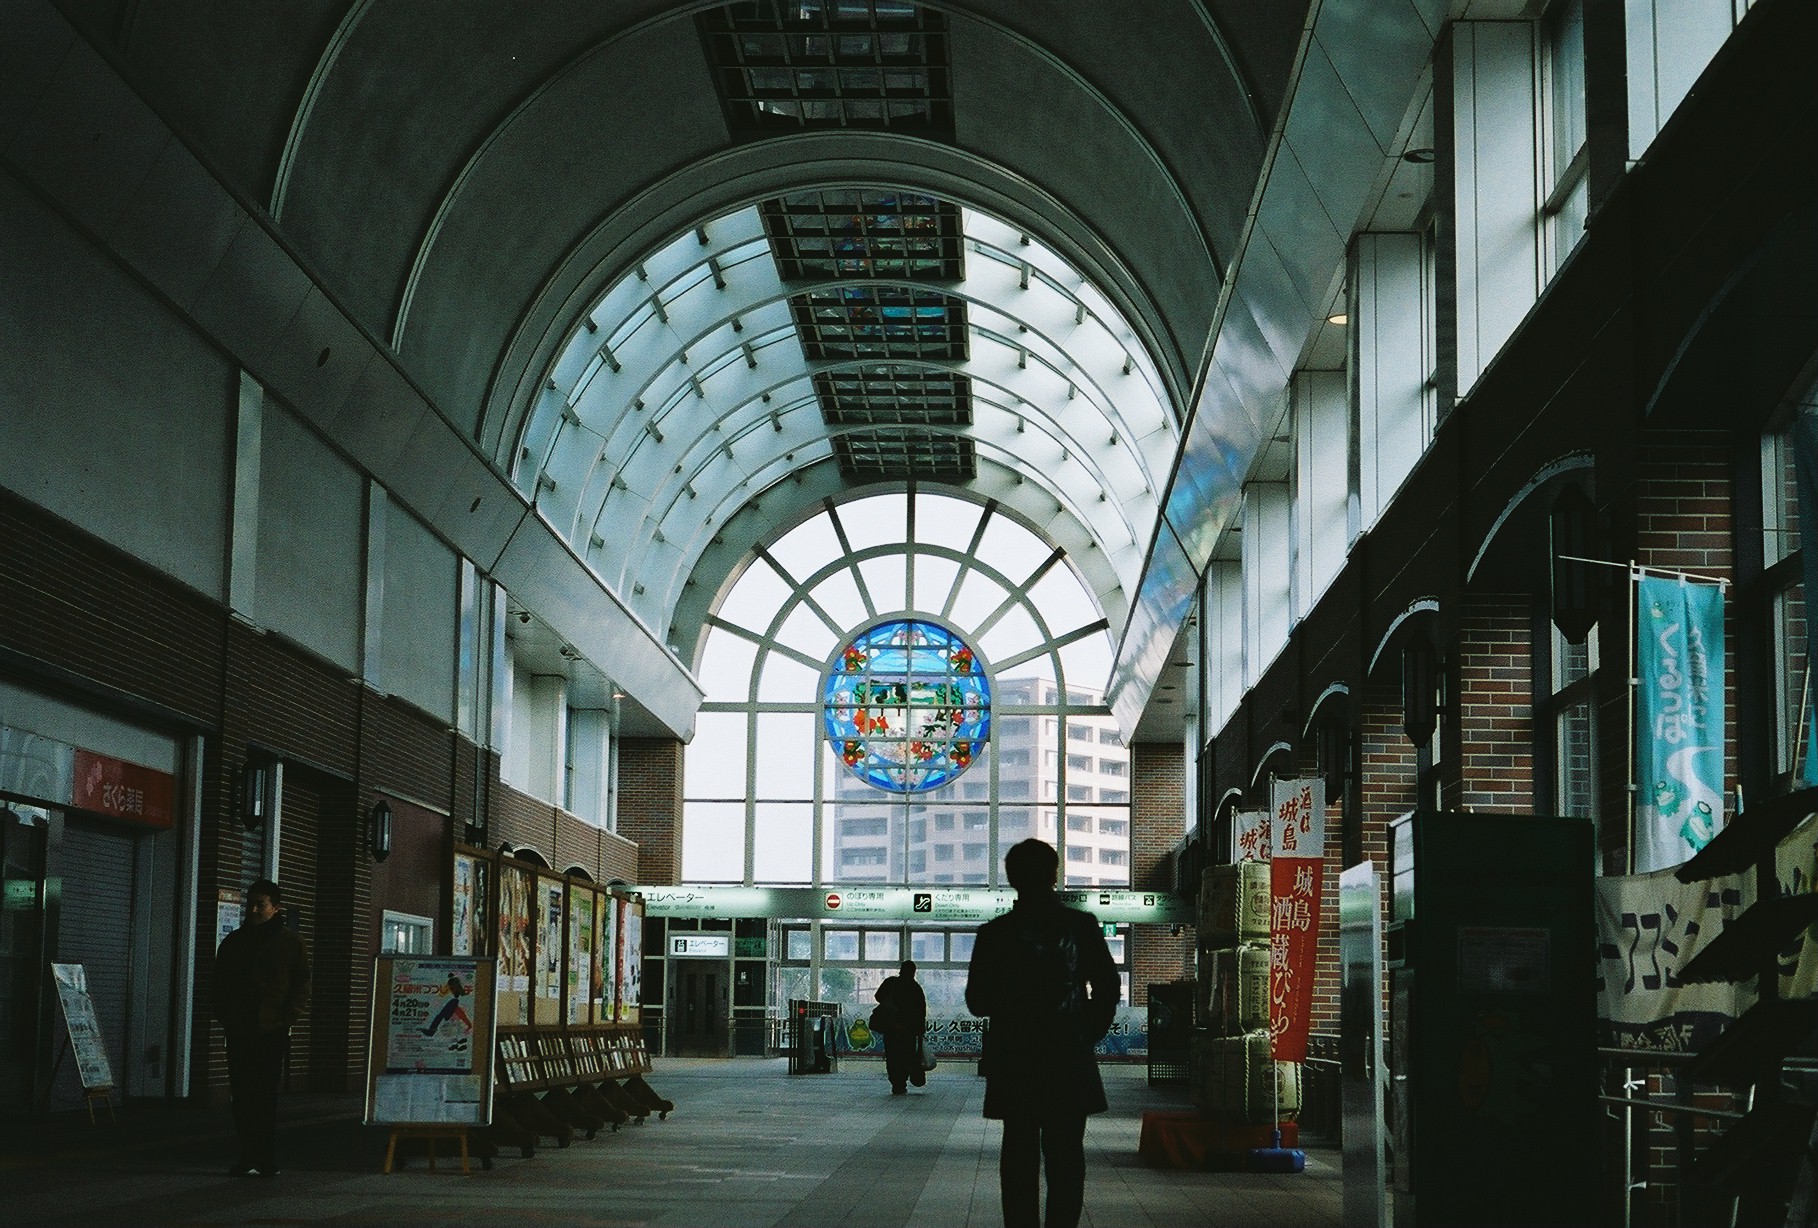
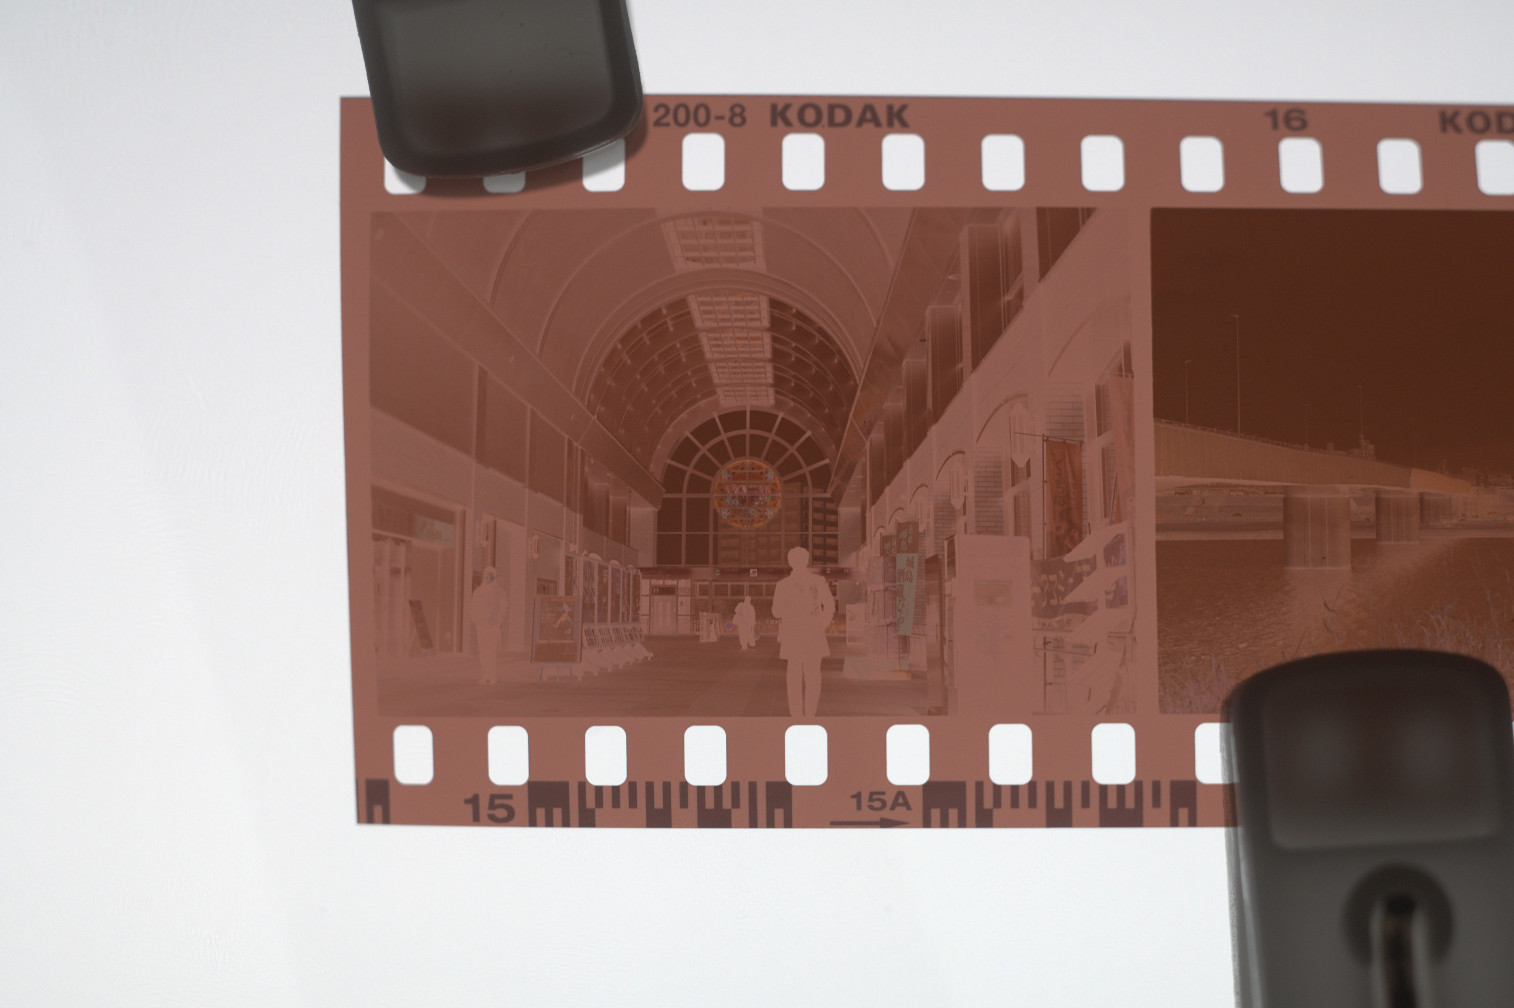
Woah, it's all yellowish and the brights/darks are inverted! What happened here and how can this possibly look like a proper photo?
In this article we'll skip the details on how we end up with a developed negative, but let's take a look on how we can get a usable image from it.
First let's try to just invert the colours for starters.
That is, after all, the most obvious problem.
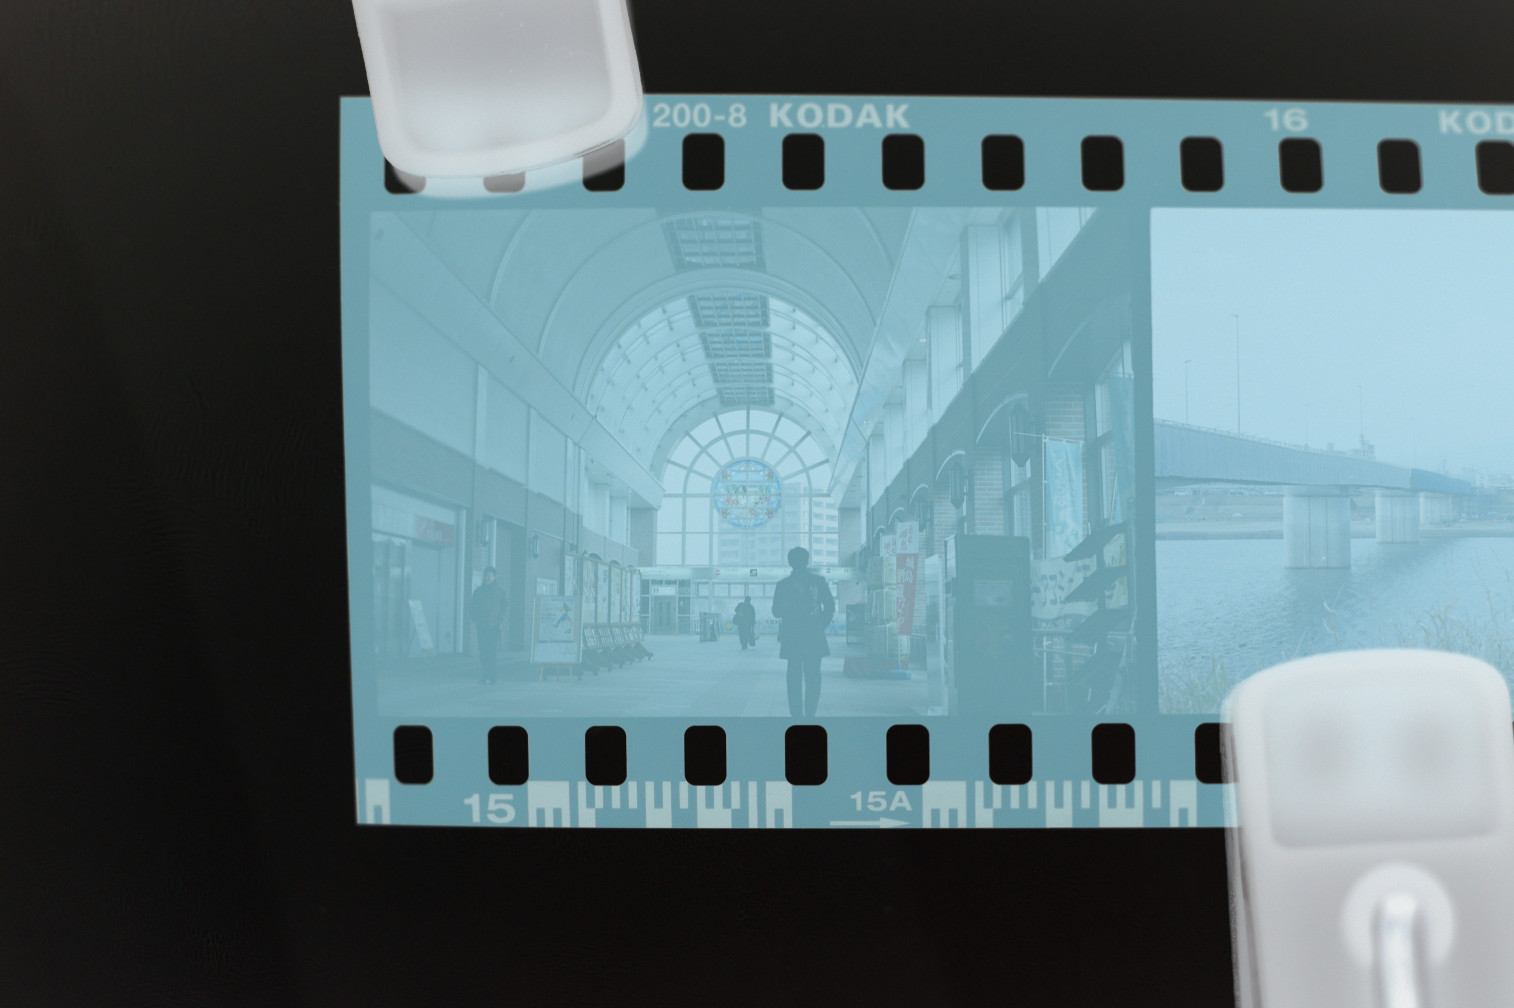
Hmm... still doesn't really look quite like what you'd hope...
It's all bluish and not at all what it's supposed to look like.
It turns out, film negatives have a "base colour", which you can see on the un-exposed edges of the film.
If we subtract out this base colour, we should now have exactly the image we expect.
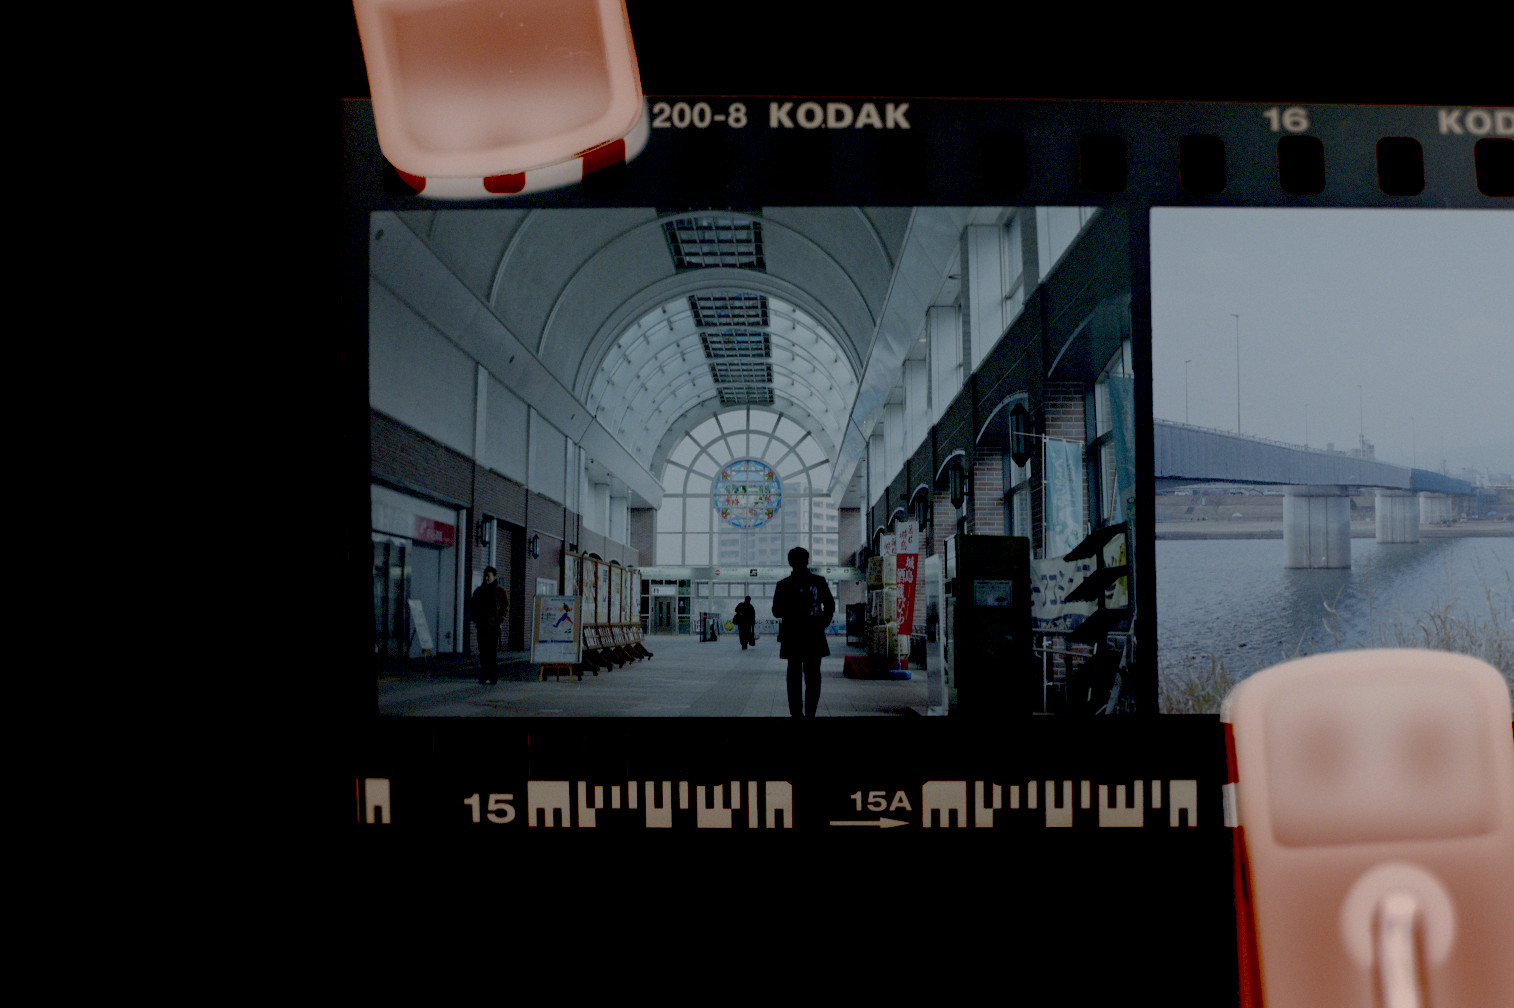
Closer, but not quite. There is no more blue tint, but now we have an underexposed look.
The film was for sure exposed correctly, so what gives?
Now we need to account for two things:
- The exposure of the camera/scanner used to digitize the film
- Interpreting the exposure (density) of the film
Even if we were printing the film instead of scanning it, we would still need to account for the second point.
Because the crystals in the film react to light, there is a different thickness (density) to the film depending on the amount of light.
What amount of density maps to full white on a screen or print paper is subjective.
With that in mind, let's try to account for all of this.
We'll use the Levels tool to bring the white point down to what should be the brightest white in the image (the sky).
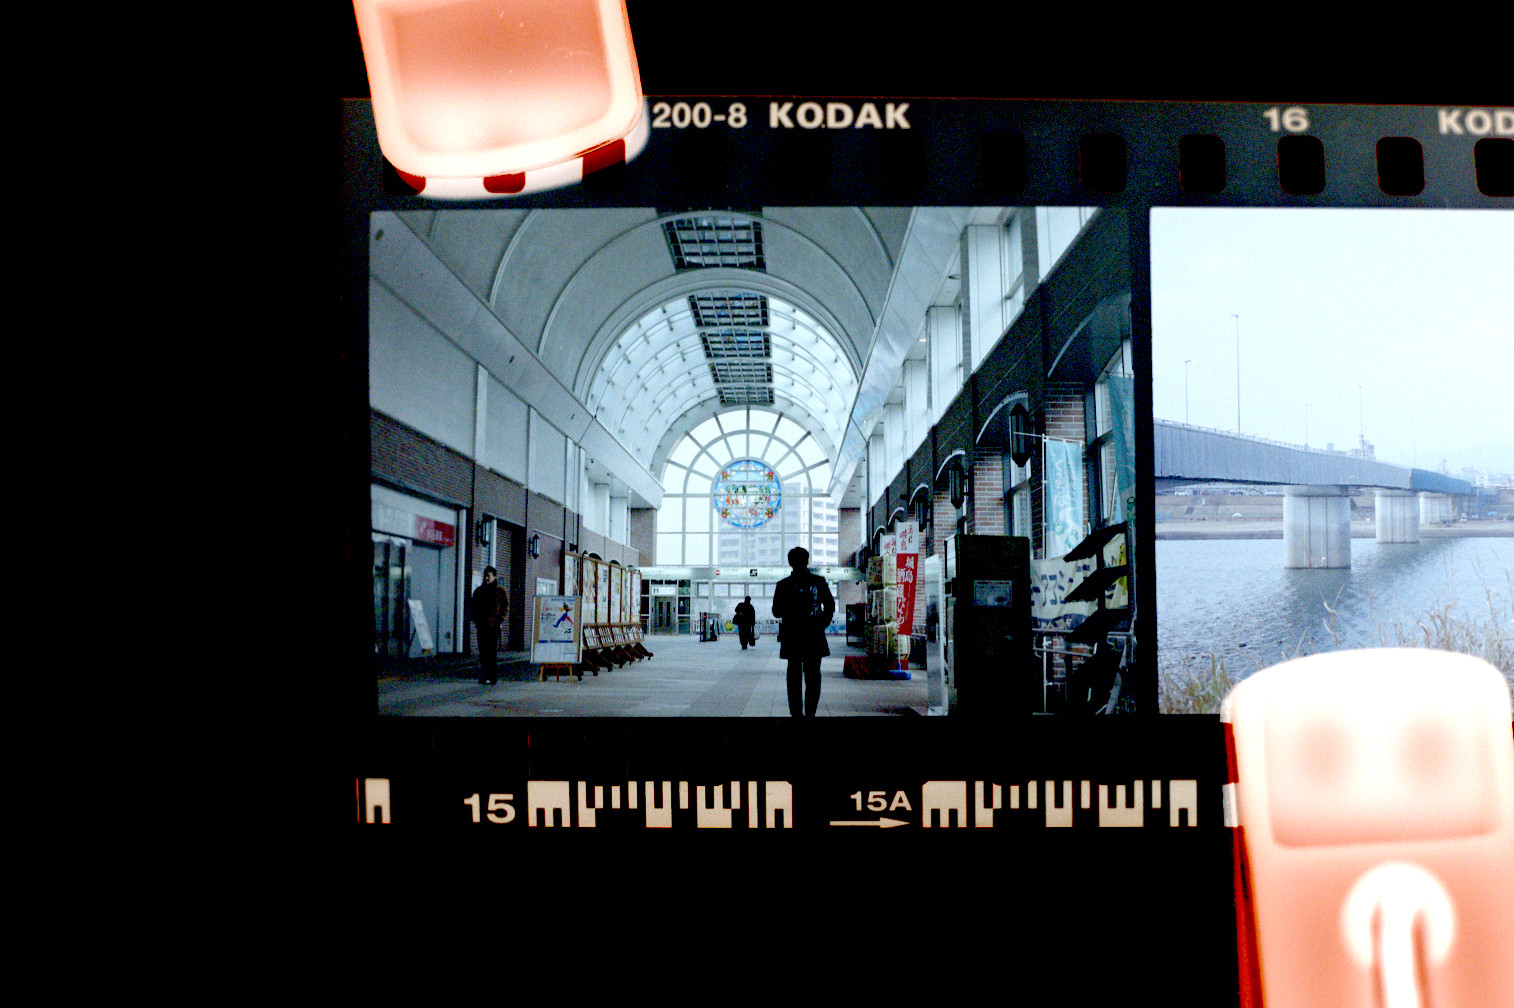
Now it no longer looks under-exposed, the bright parts are properly bright.
That being said, it feels a bit washed out overall compared to the lab scan.
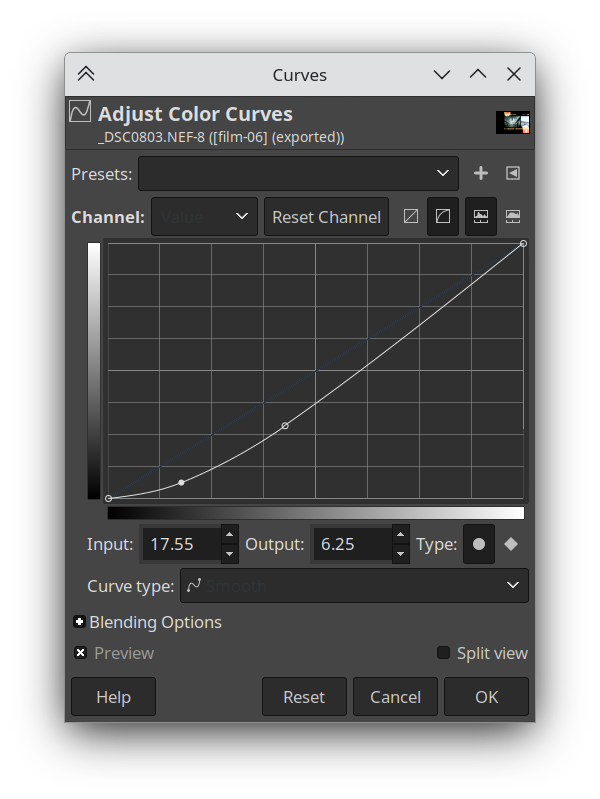
Let's apply a curve to the light values, to get some more contrast.
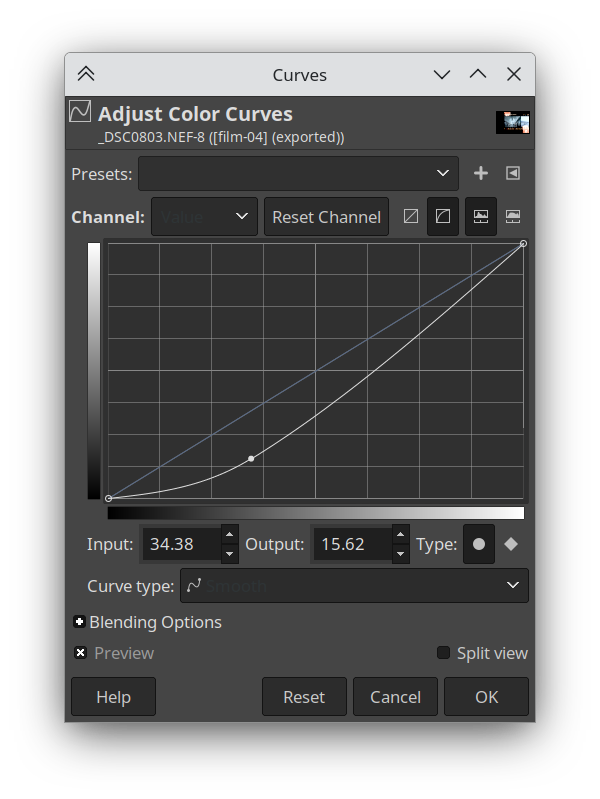
Now we're closer in terms of brights/darks, but there is still a difference in colour.
Even though we removed the base colour, things are still looking a little bluish.
The red in the bricks for example, is dull and bluish.
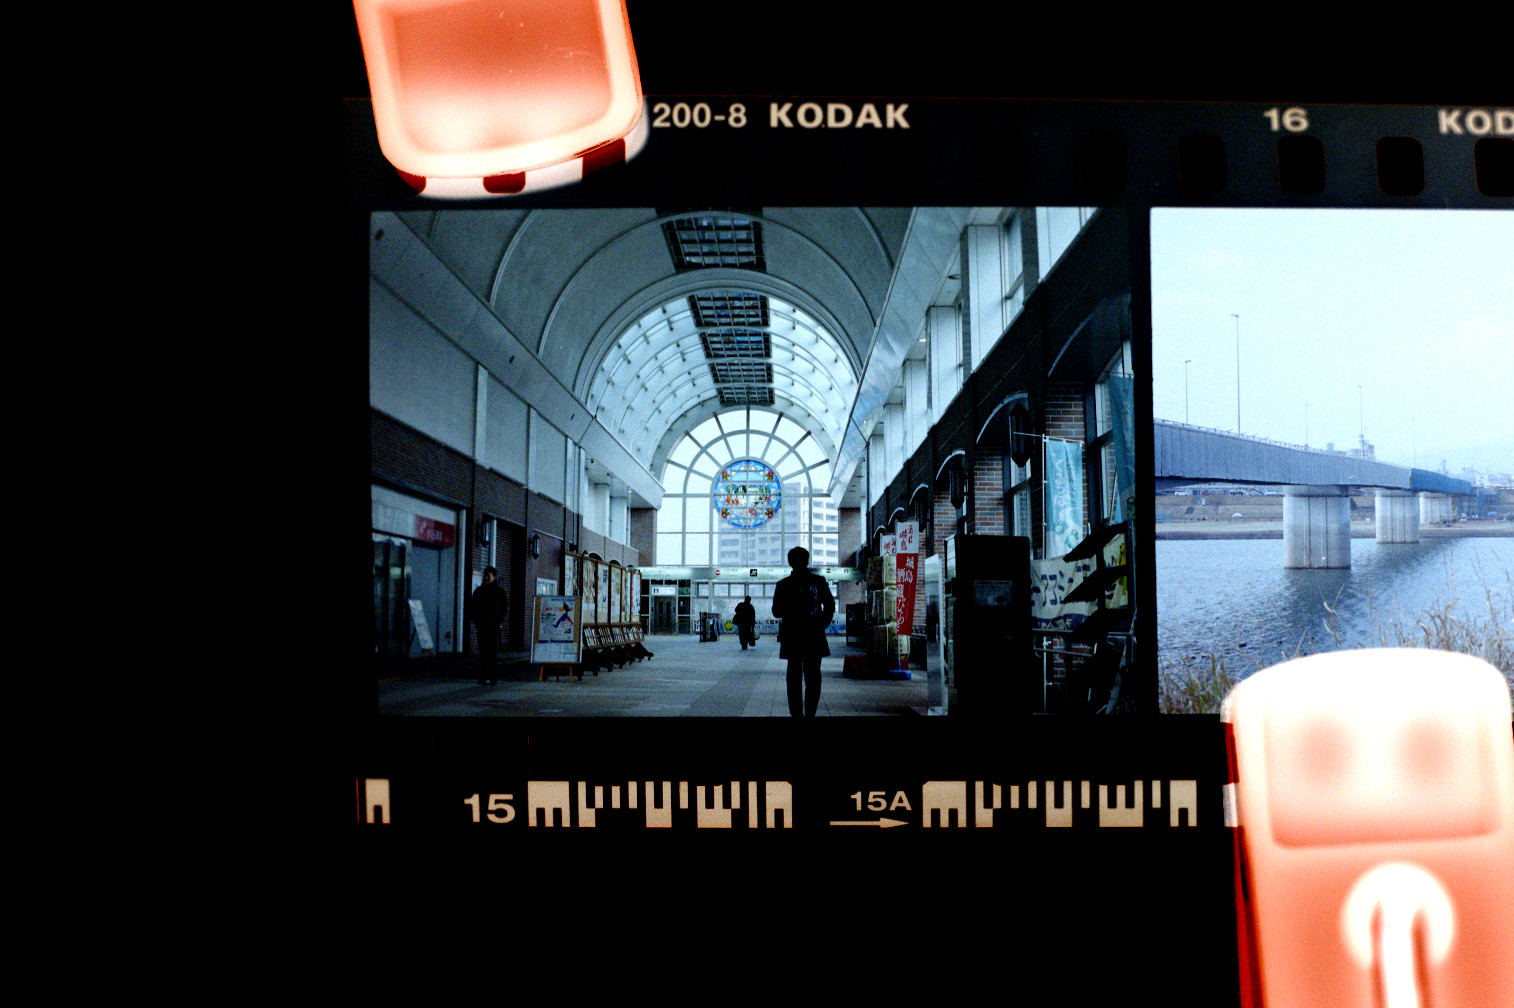
So let's tweak the individual colour channel curves to get something more natural-looking.
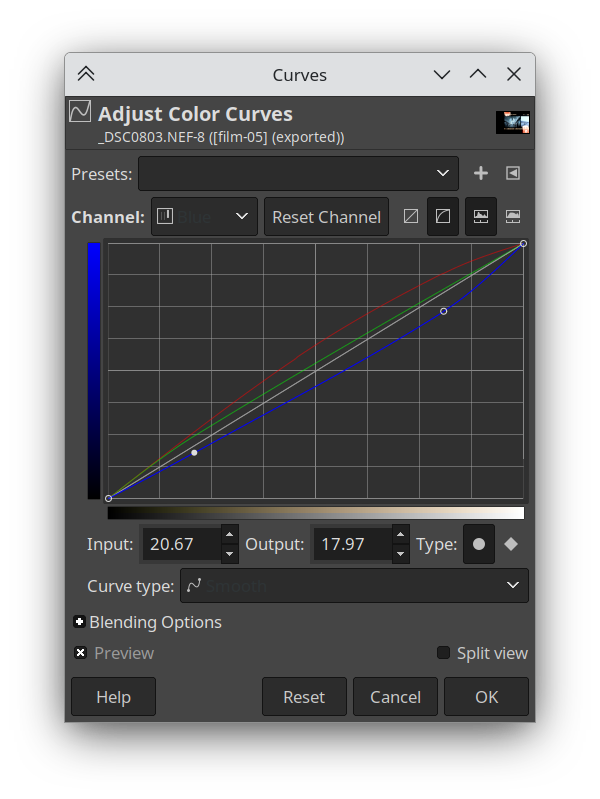
Now we're looking more natural, and much more like the lab scan.
There is maybe a small missing bit of contrast in the darks, so here's another value curve adjustment.
Finally, we compare with the lab scan again.
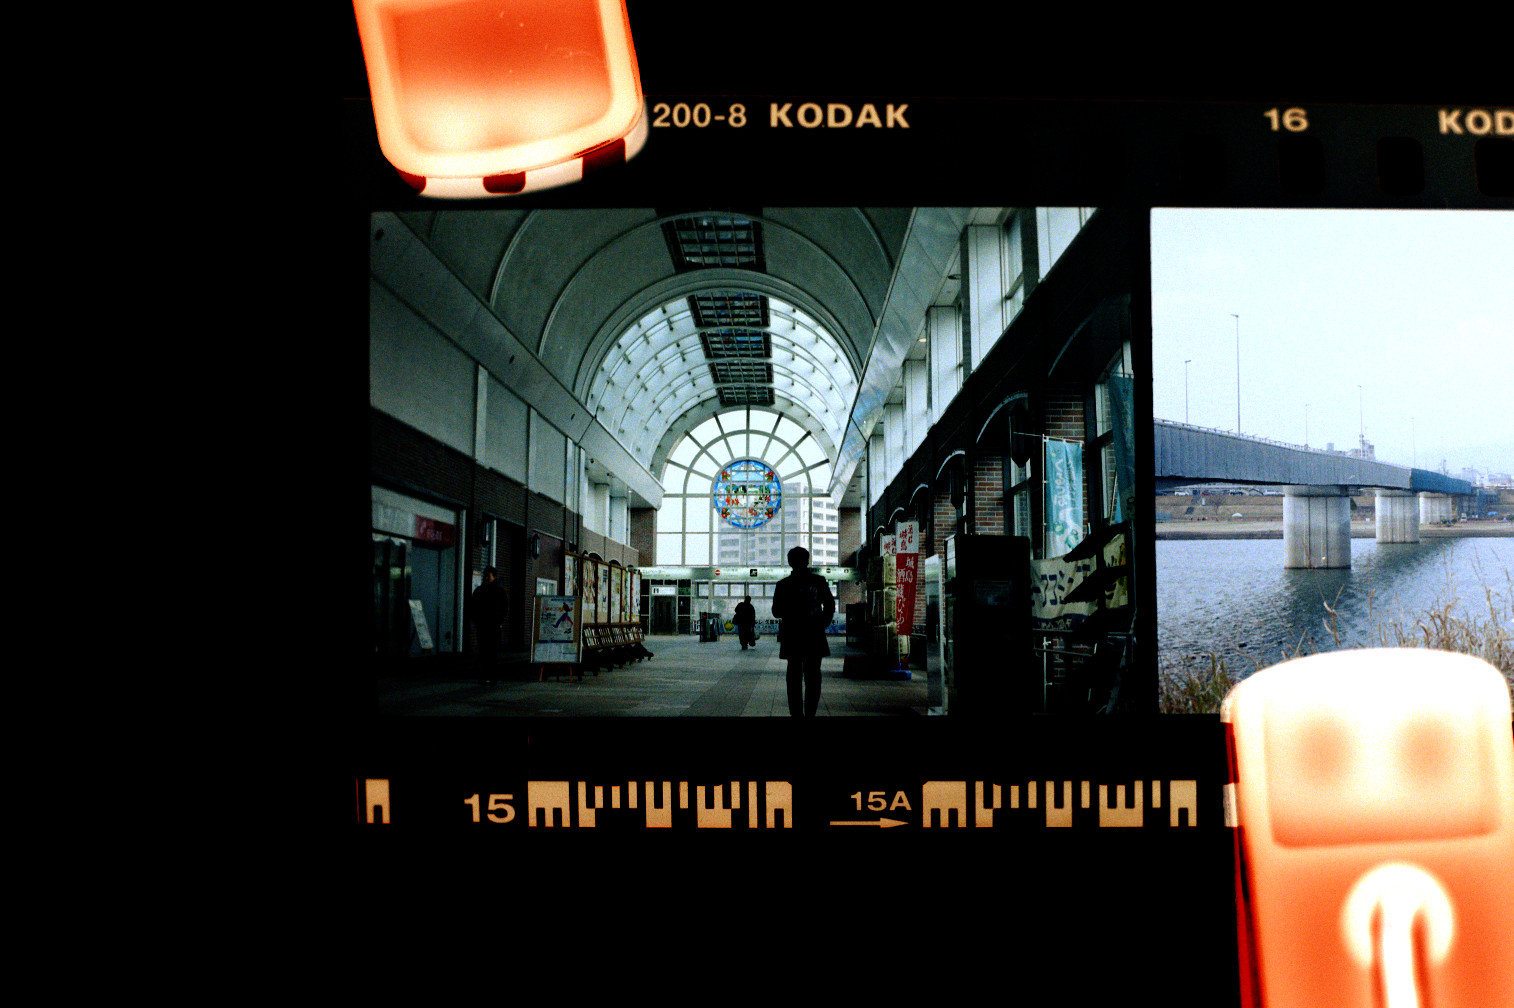
Success!! Or is it? We've matched the lab scan, but how did the lab scan come to be in the first place?
Well it turns out scanned film can have many many types of looks and there is no one way the film stock is supposed to be.
It depends on each individual photo, and the type of film stock.
If we consider white balance alone, film is usually balanced for either 5200k (Daylight) or 3200k (Tungsten). If your scene is not exactly one of those two, it will be out of whack and need adjustment.
Color temperature adjustment is an integral part of not only scanning film, but also printing.
Whether scanning or printing the film, this adjustment would take place either with a software algorithm or the lab technician's subjective decision.
It's all subjective
What did we learn from this experiment? That there is in fact no such thing as what a film photo is "supposed" to look like, and that a scanned/printed photo is in fact subjected to the whims of the technician/algorithm.
So what does this have to do with digital camera RAWs? We will get to that and see how the same principle applies.
For now, let's take a look at some more examples of lab subjectivity.
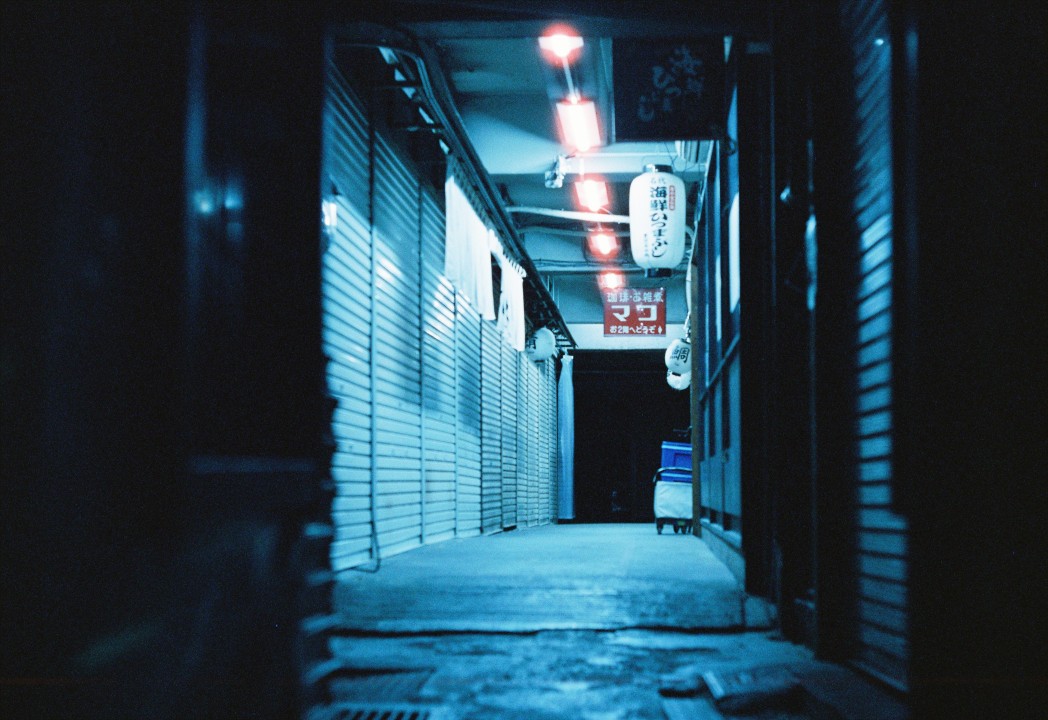
Consider these photographs, developed and scanned at two different labs.
First of all, they are very blue/green because of using film stock (Cinestill 800T) which is balanced for 3200k tungsten light.
This is in fact the look that this trendy film stock is most associated with on social media, and customers would be very upset if the white balance where to be corrected more aggresively to account for photos not taken under tungsten lighting.
It really underscores the fact that a film stock's "look" is really more about what it is expected to look like.
But let's take a look at the differences.
Now these are far from being an apples-to-apples comparison, these are two photos taken at completely different places in different countries with wildly differing lighting conditions.
And yet, we can tell that they feel very different.
They almost look like two different film stocks.
One of the photos is very contrasty and has aggressive saturation and colour shifts.
The other photo is more conservatively saturated, with a mostly-natural colour balance.
It also brings up the black levels so the photo does not fade to pure black (which also makes the grain more prominent).
It is by all means more attentatively-adjusted, perhaps more tuned by hand than the other shot which was likely using the machine presets.
And yet, it is completely the wrong look. Because this is not at all what you expect from a Cinestill 800T photograph.
This film is supposed to look crazy and sci-fi, with saturated blue or green surfaces and high contrast.
In other words, people expect it to look like a largely untuned Noritsu scan preset.1
Here is another (more one-to-one) example, this time where Kitamura Camera went wrong and where my own poor-quality macro photo of a scan ends up with better colours.
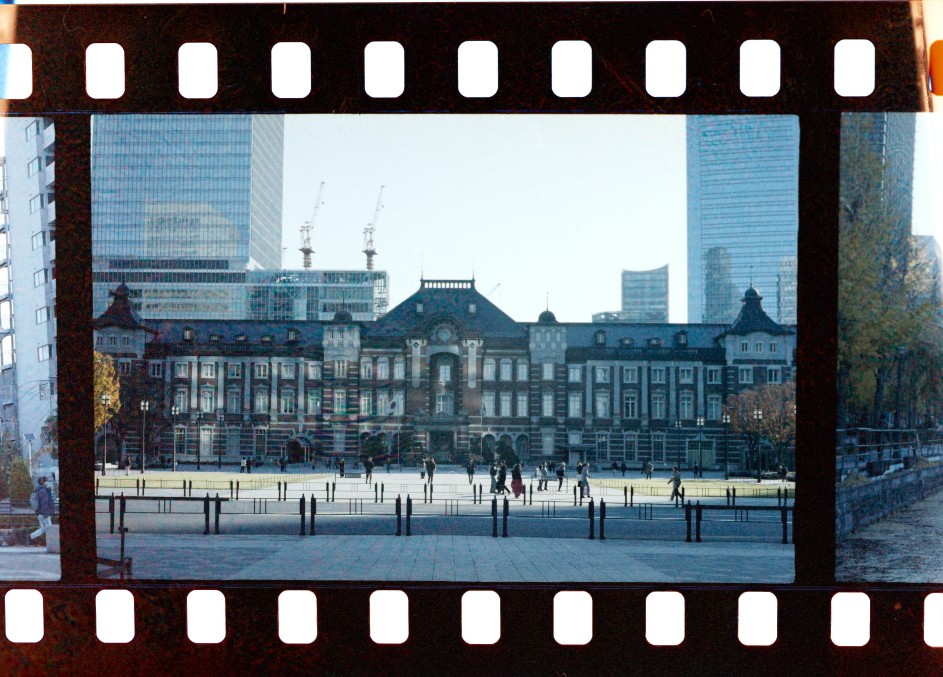
This is an experimental film stock made in Hong Kong that I bought on a whim at Yodobashi Camera when the film I wanted was out of stock. Imagine my disappointment when I got back the scans and they looked like the above! I figured, this was not even colour film just teal-tinted monochrome film...
But if we rangle the colour curves ourselves, we can get more tones and even see the Tokyo Station bricks come out reddish. It turns out, Kitamura Camera probably doesn't have a scan preset for this film, so the scans don't compensate for its colour balance. The new Harman Phoenix film stock seems to suffer from a similar problem, where you can get much more "normal" scans if you do it yourself rather than use a lab.
Why RAWs are like film negatives
The gist of the film negative exploration above is that photos have no canonical look and are always exposed to subjective interpretation.
Film stock simply captures waves of light, and has a non-linear response that is adjusted by the film manufacturer to result in a pleasing image. On top of this, scanning/printing film also requires some degree of interpretation. Subjectivity is built-in to each step of the pipeline.
How about digital RAWs? Digital camera sensors are also simply light capture devices, and the signal must also be interpreted.
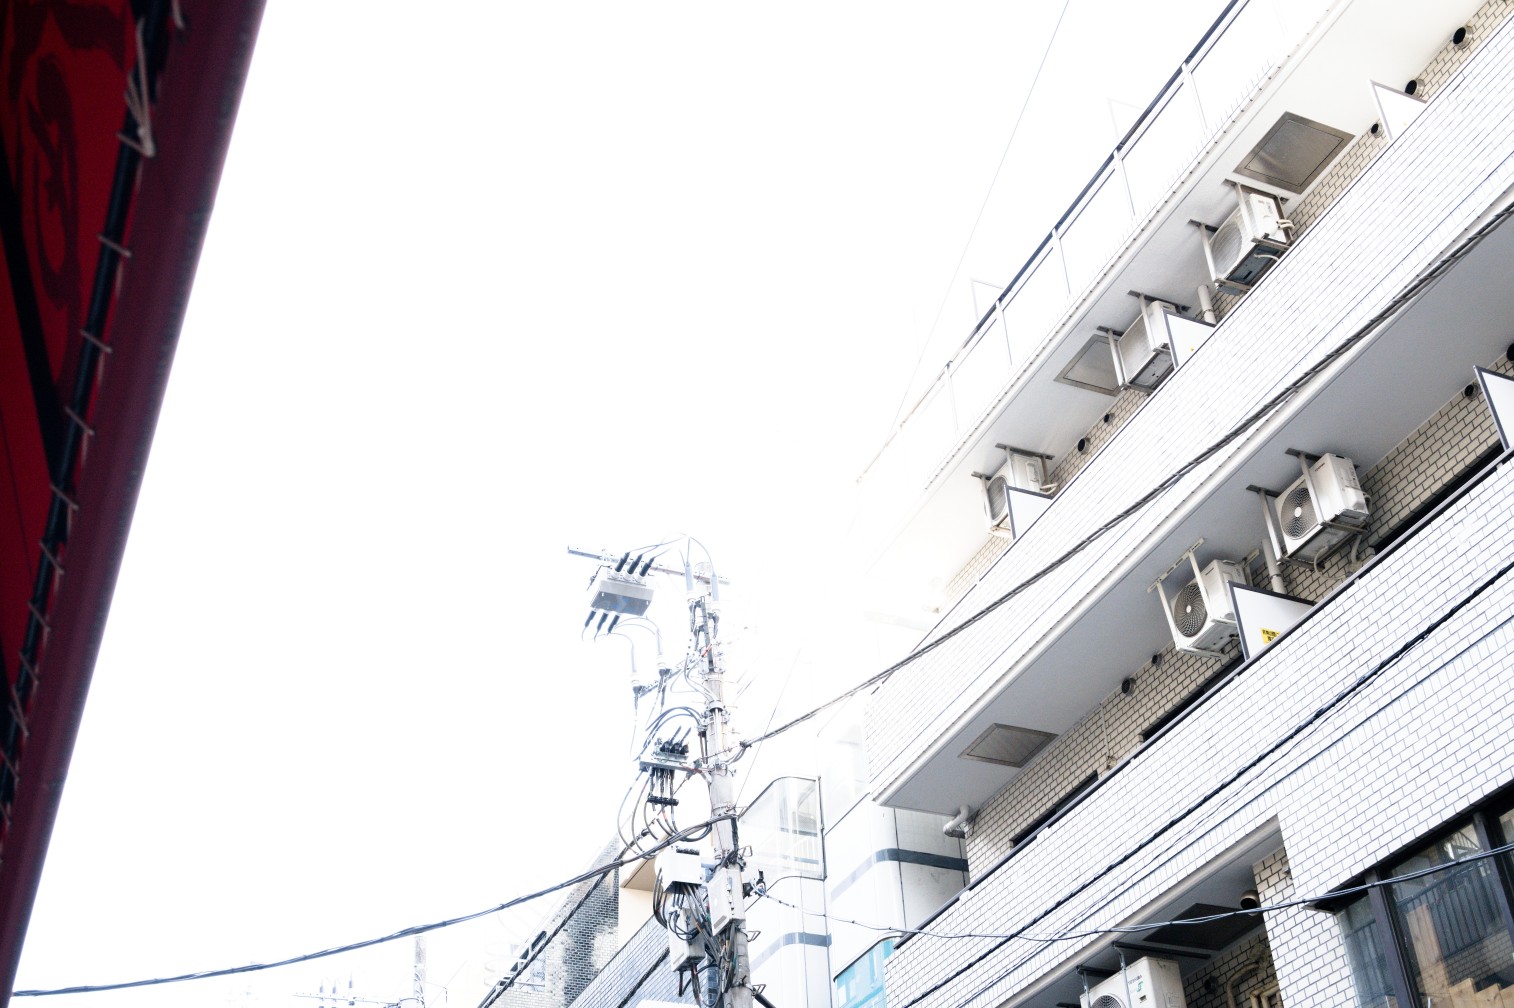
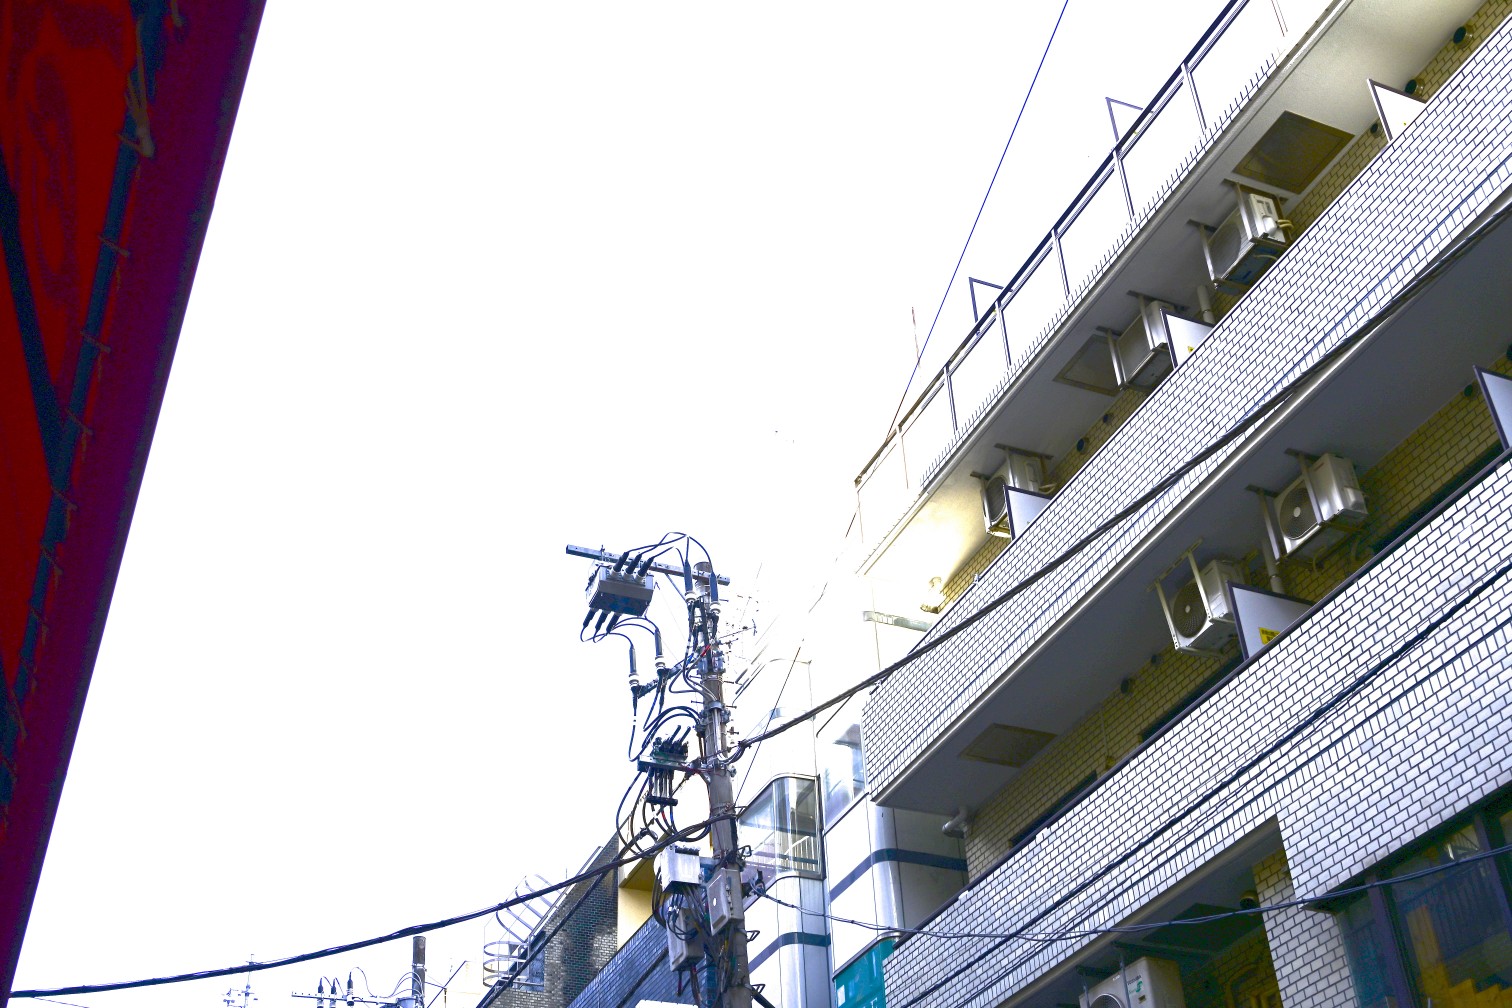
Let's take a simple example. A JPEG image straight-out-of-camera, and RAW processed in a variety of ways.
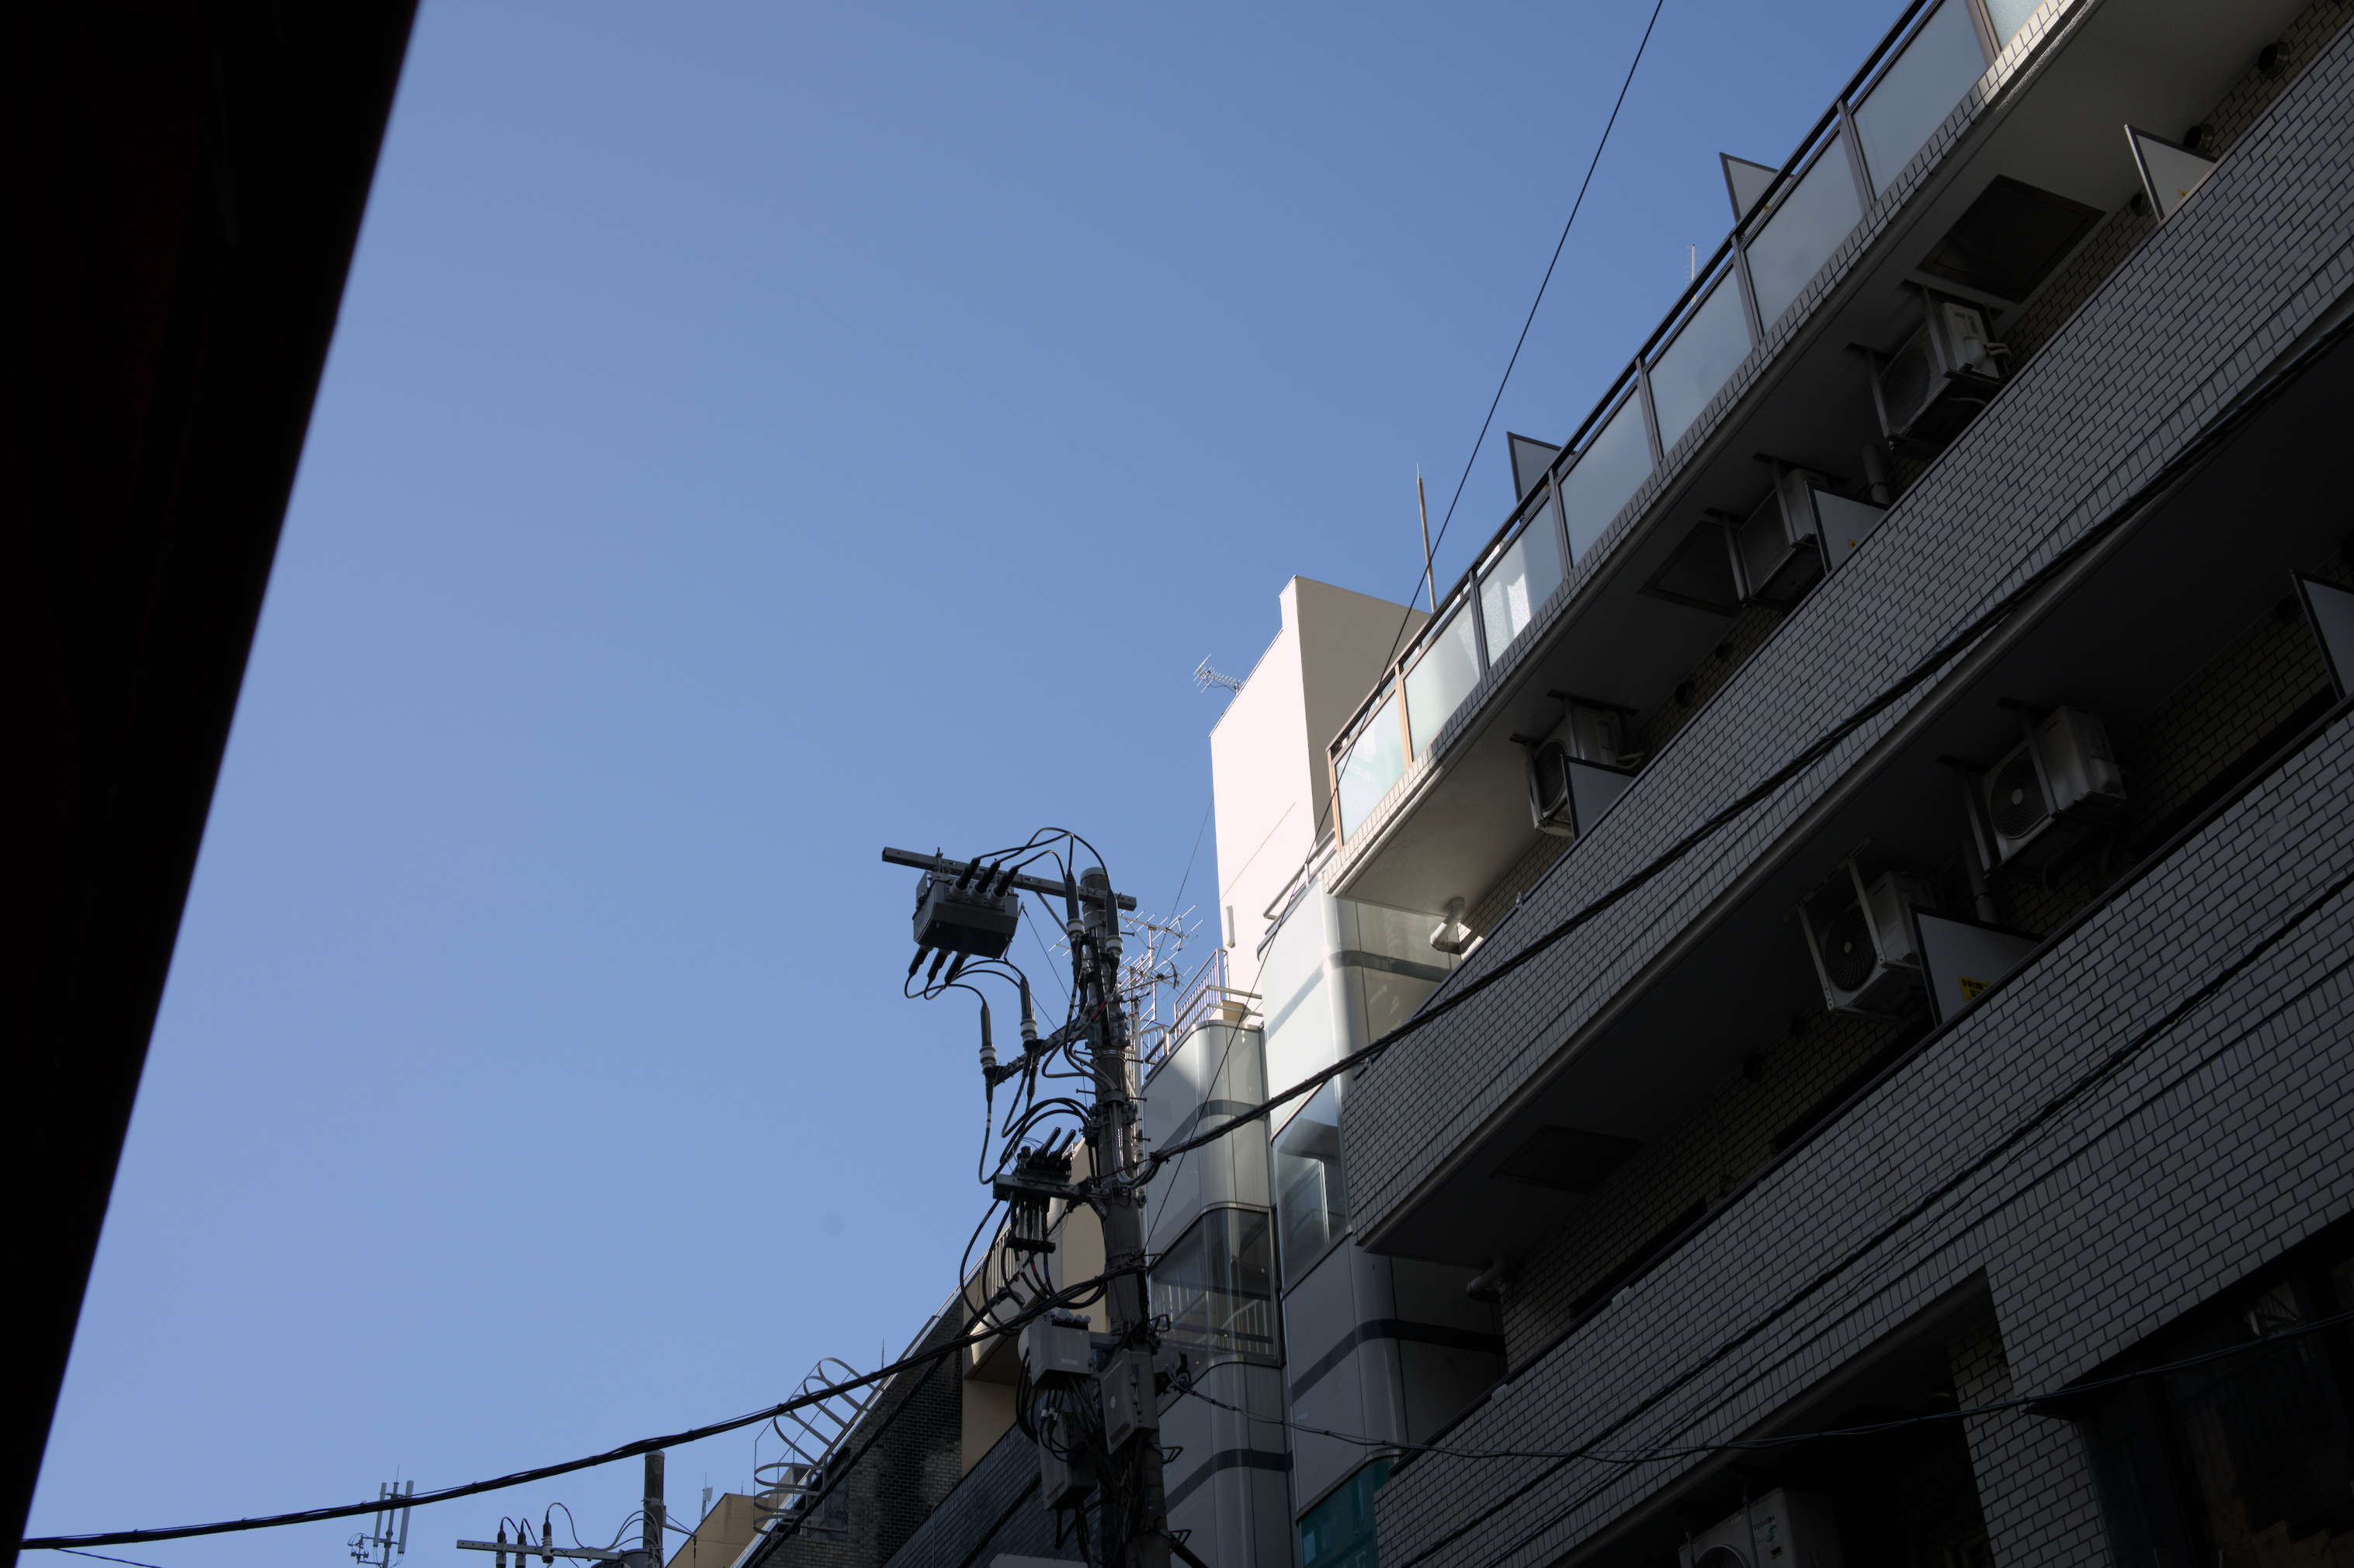

It seems just switching to RAW already gives us a different result, and on top of it we have different looks in different software! If you consider that the RAW is like a film negative, the reason behind this becomes easy to understand: a RAW photo is not in itself an image but instead the data that can be used to create an image.
What this means is that the camera itself also interprets the RAW in its own way.
In fact there are often multiple presets you can choose from like Standard/Vivid/Portrait/etc... that give you different "looks".
Fujifilm cameras go even further and call these film simulations, with each preset modeled after different film stocks.
Because cameras all have different ways of interpreting the RAW light data, you can only ensure a 100% matching result by using the camera manufacturer's official software.
Other software, including Lightroom, simply tries its best to match the results either by using pre-made camera profiles, or comparing the thumbnail JPEG embedded inside the RAW.2
We can see then that the above processed RAW images are actually not the RAW data itself, but interpretations based on it.
So what would a RAW image look like if viewed directly? The range of light values is actually quite a lot wider than can be displayed on a screen or printed on a page, so we can only really see a limited range of values. But let's try to take a look at a more raw RAW.
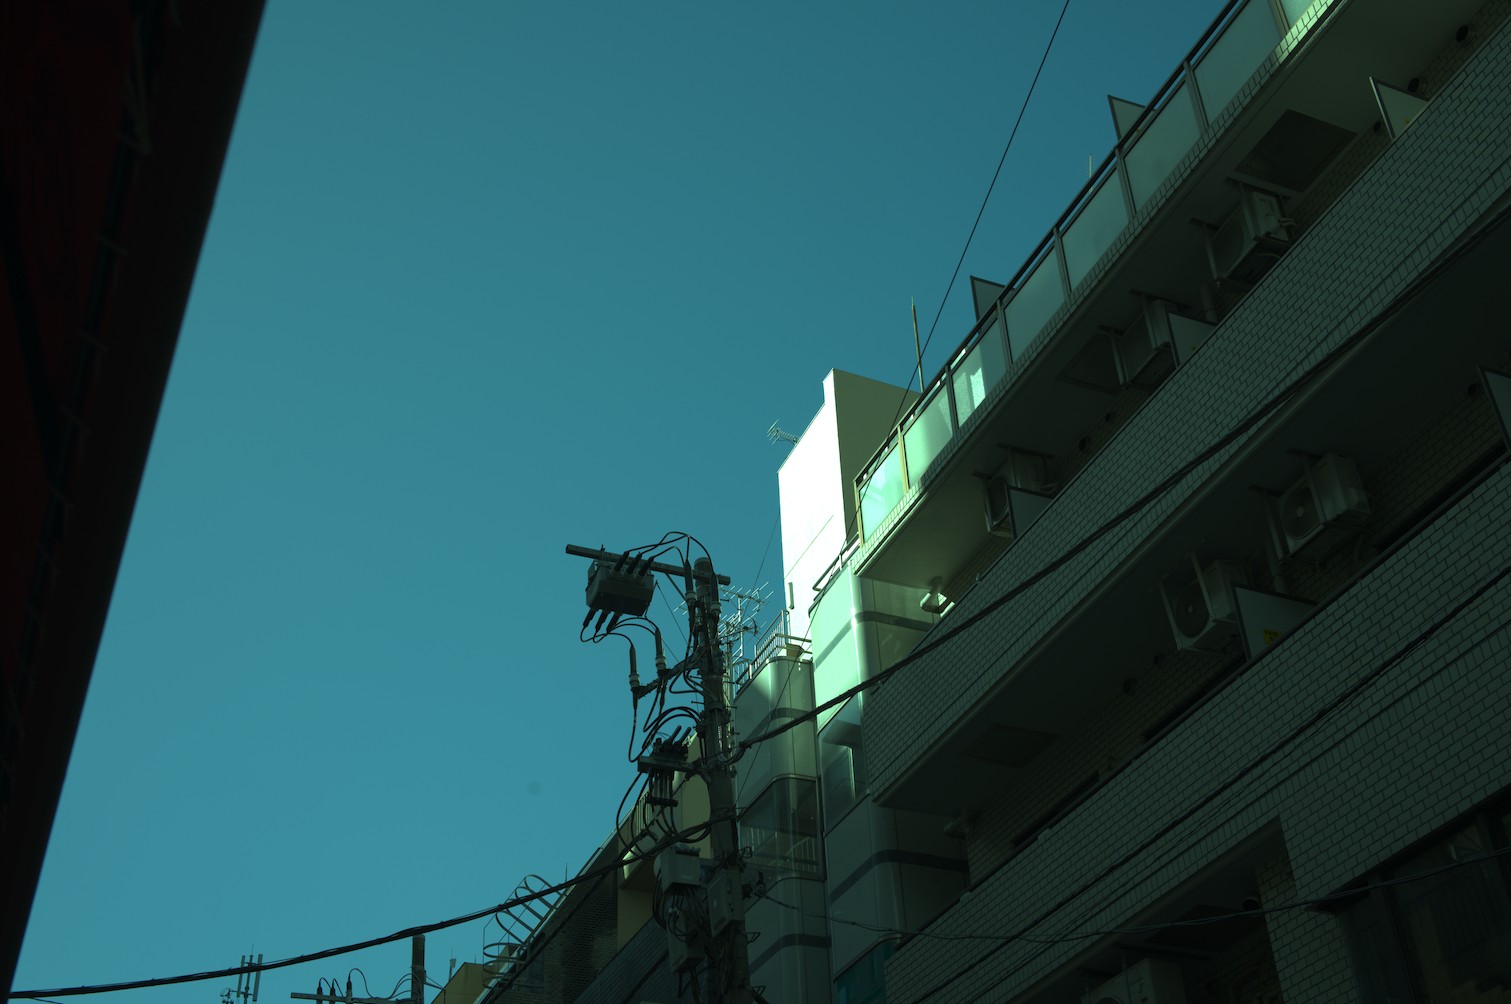
The image appears quite flat with clipped highlights, and the colours are rather green-ish.
Indeed there is no white balance applied whatsoever, and the wide range of values is allowed to exceed 100% pixel brightness.
But what if I told you that this still is not actually the real RAW image data?
Let's turn off the demosaic module as well and see exactly what the camera gives us.
For clarity, this is going to be a small cropped region of the image.
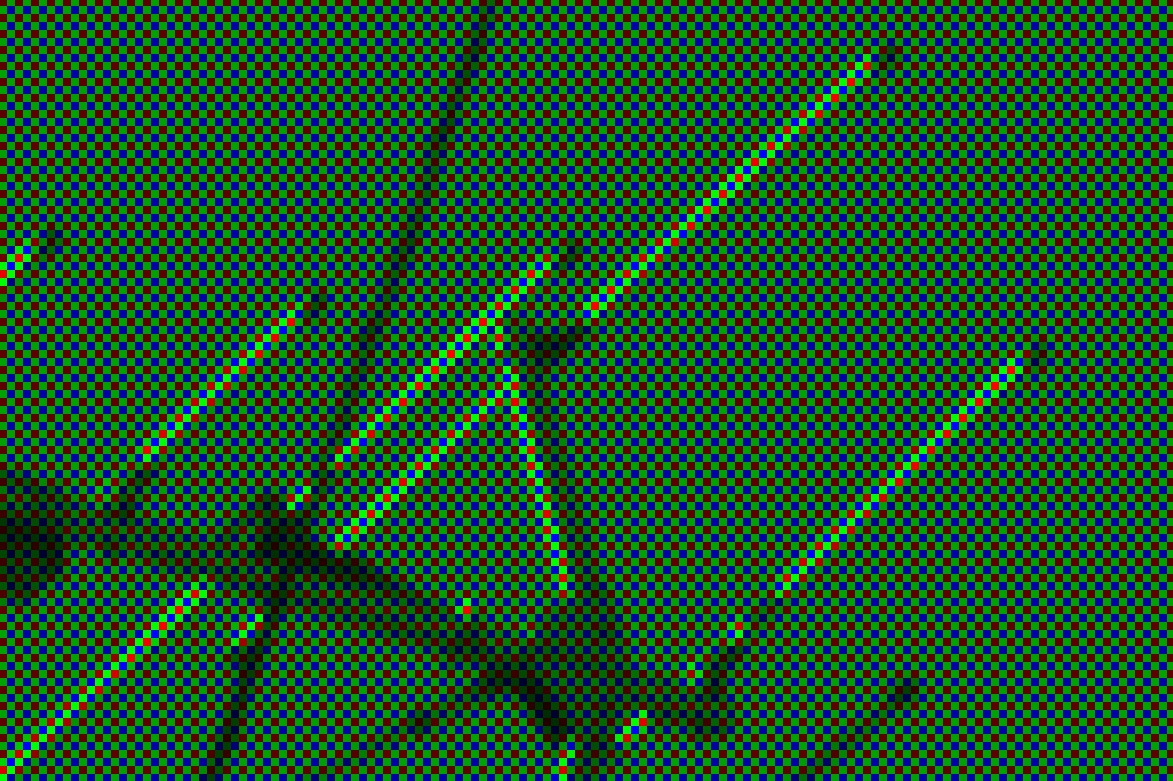
Pixels seem to not all be equal! Some pixels are only red, some only green, and some only blue.
The reason is because of how a colour sensor functions. Where film had multiple layers with red-sensitive/green-sensitive/blue-sensitive dyes, most digital cameras instead have a Colour Filter Array placed on top of a monochrome sensor. These filters let in only a segment of the light spectrum.
The implication of this is that each pixel does not actually have all the colours! In fact there are twice as many green pixels as red/blue pixels, because the human eye is more sensitive to green light.
All of this means that software to develop RAW actually need to do a whole host of things in order to obtain a usable image, let alone a pleasant image. The actual process is something like this:
- Demosaic the RAW image, to fill in the "missing" colours in each pixel.
- Adjust the colour balance.
- Apply a curve to the image, to fit the wide range of values to the dynamic range of a computer monitor.
RAW data includes metadata for the software to know in what pattern the pixel colours are arranged, how to convert the colour space, and what the colour balance was when the photo was taken.
The software can use this data, or not use it, and the user can fully control every step of the RAW development process.
Wide dynamic range
You may ask what the point of taking a step back and interpreting the photo from RAW data, rather than simply adjusting the JPEG photo from the camera.
Other than the obvious fact of avoiding applying JPEG compression multiple times losing detail, the main advantage is dynamic range.
Regular computer monitors3 use the sRGB display standard, which uses 8-bits-per-channel giving a value range of 0-255. 0 meaning as dark as the monitor can display, and 255 meaning as bright.
RAW data from a digital camera on the other hand is commonly 12-bits or 16-bits, meaning a range of 4096 values or even 65536 values!
Because the camera in reality records such a wide range of values, a RAW image has much more flexibility in how dramatically it can be edited.
The final image ends up with only a slice of this luminance range, so we can slide that slice up or down.
Consider the following, a highly darkened/brightened RAW image compared to the same operation on a JPEG image.
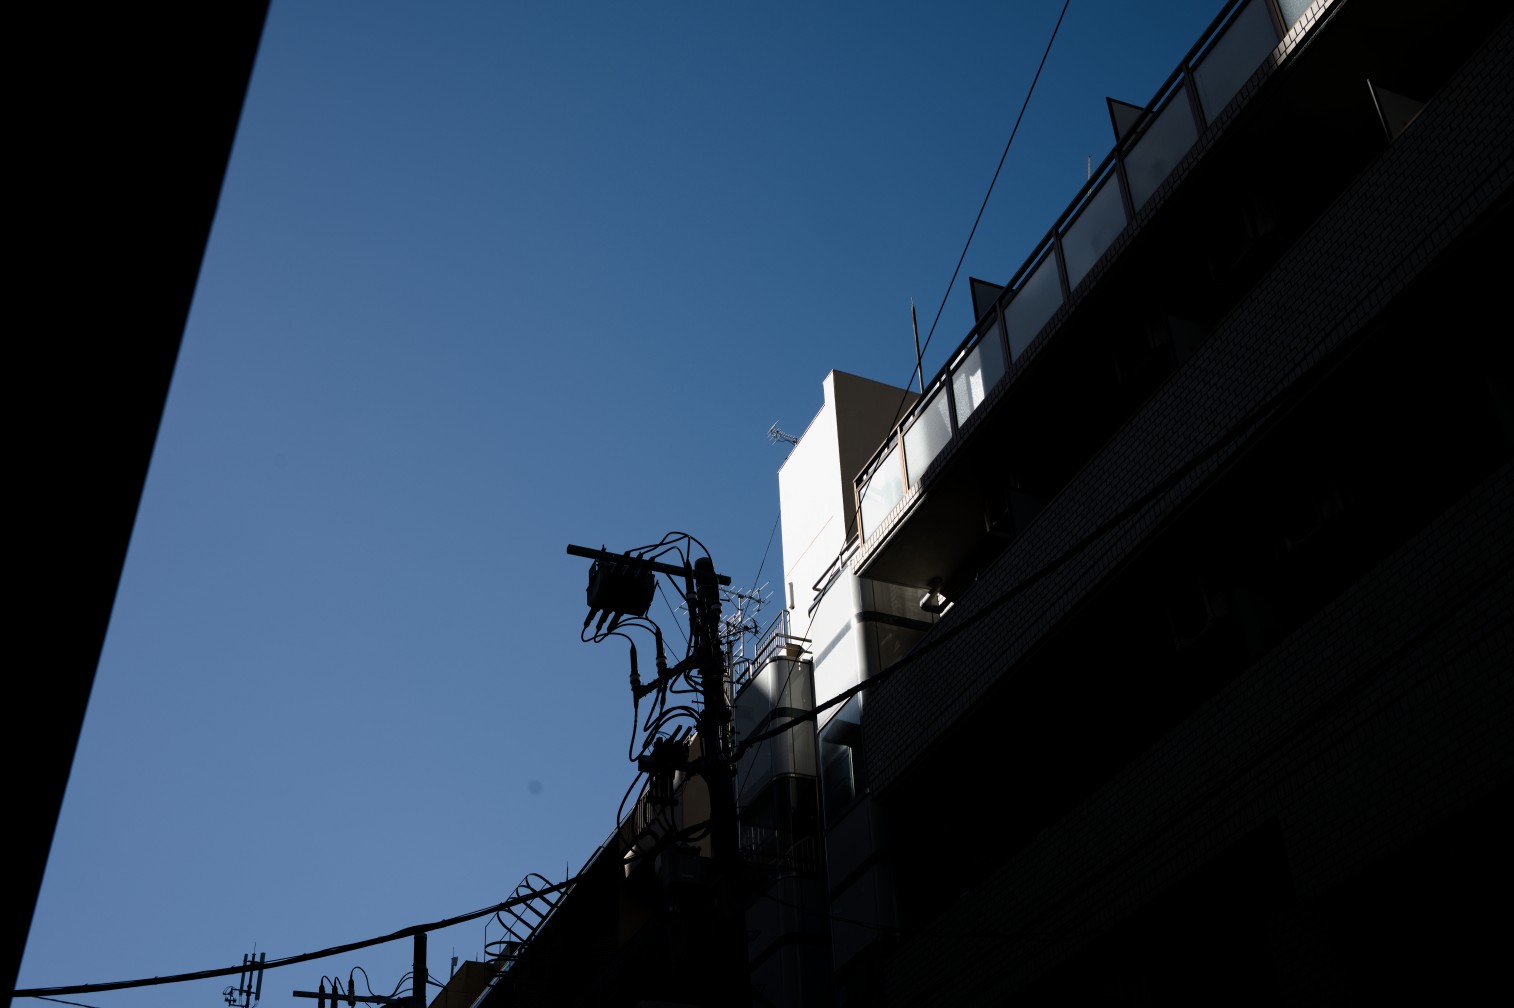

Essentially, rendering an image to be displayed on an 8-bit sRGB monitor is a destructive operation meaning information is lost. Therefore the only way to perform adjustments on a photograph without losing information, is to edit a RAW.
Conclusion
After all this, we can start to see that the concept of a non-edited photo does not really exist. The response of the sensor/film to light is already biased by human vision, and on top of it different lighting scenarios will need adjustment to look correct.
The wide dynamic range also needs to be squished down to the limited range of light that a computer monitor can display, or the limited range of dyes that a printer can print.
At all of these steps a decision is made by someone, whether that is the photographer, the lab technician responsible, or the engineer behind the algorithm.
Shooting RAW instead of JPEG allows you to control every step of the image formation process, rather than only choosing from a list of look presets that Nikon/Canon/Sony/Fujifilm have crafted.
Editing a photo is simply shifting who is responsible.
We only touched on the overall picture (pun semi-intended) of the camera-to-screen pipeline.
Stay tuned for more!
In the meantime, check out these awesome articles for more details!
The Spectral Response of Digital Cameras
Understanding Digital Raw Capture (by Adobe, PDF format)
The Life Cycle of an Image
-
Whether or not Kitamura Camera does a lot of hand-tuning, or even what brand of scanner they use, is complete guess-work on my part. I've managed to have very consistent results from three different locations of Kitamura Camera, so I assume they have a very standardized procedure with specific settings for each film stock. ↩
-
Lightroom seems to prefer the per-camera hand-tweaked profile approach, and RAWTherapee uses a bit of both but has a feature to match the value curve of the embedded thumbnail. Notably, Darktable embraces the RAW development is just an interpretation train of thought, and offers no effort to match camera JPEGs. Instead it provides a high-quality filmic tonemapper and color grading controls, in order for you to craft your own look. By default the images come out looking quite flat, ready for you to perform your artistic adjustments. ↩
-
As of 2024, HDR (high-dynamic-range) monitors are not yet the norm! If you're reading this far in the future, this may be quite different. We may end up developing the RAW photos into HDR images for HDR displays! ↩