RAWってなに?: その1
この記事の翻訳は作業中です
最先端なデジタルカメラで写真を撮った瞬間に、シャッターが開き光が瞬時的に記録されます。
そのあとメモリーカードを取り出して素晴らしい写真、そしてその鮮やかな色を眺めることは、皆さんは経験済みな流れなのではないでしょうか。
しかし一部の写真が明るすぎたり暗すぎたり、調整したくなります。そしてあんまり調整が効かずにJPEGの制限を実感してしまいます。
いつの間にかLightroomのサブスクを予約するはめになり、JPEG撮影からRAW撮影に舵を切る。
写真好きならおそらくこの道を渡ってきたことがありますよね。
RAWに切り替えることによって調整の幅が大きくなりましたが、そういえばRAWってなんぞや??って疑問に思うこともあるでしょう。
そしてなぜ場合によっては「デジタル・ネガ」とも呼ばれているのでしょうか?色々見ておき疑問を解消してみましょう。
時代を遡り
デジタルで楽々撮影できるようになる前に、フィルムで写真を撮影する時代がありました。
(私は全然その世代ではないのでフィルムリバイバルな現代の目線で書きます)
レトロでビンテージなフィルムカメラで写真を撮った瞬間に、シャッターが開き光が瞬時的に記録されます。(この部分は一緒!)
フィルム一本撮影し終えたら、光に露出されないように巻き戻し、現像してくれるカメラ屋さんに持っていきます。
しばらくしたら出来上がったスキャン・プリントが戻ってきて、フィルムらしい美しさに魅了されます。
しかし間では何が起きているのか?デジタルのRAW形式となんの関係があるのか?これから見ておきましょう。
一番大切なポイントとしては、最終的に得た画像は実際にカメラが撮影する物ではないということです。
人間の視力そして光波への反応は、現実の完全な反映ではないのです。もちろんカメラセンサーもフィルムも同様。
つまり写真を写す流れ全体が、人間が見たときに自然に見えるようになる、客観的な判断で構成されているのです。
現像済みのフィルムネガを実際に見てみましょう。
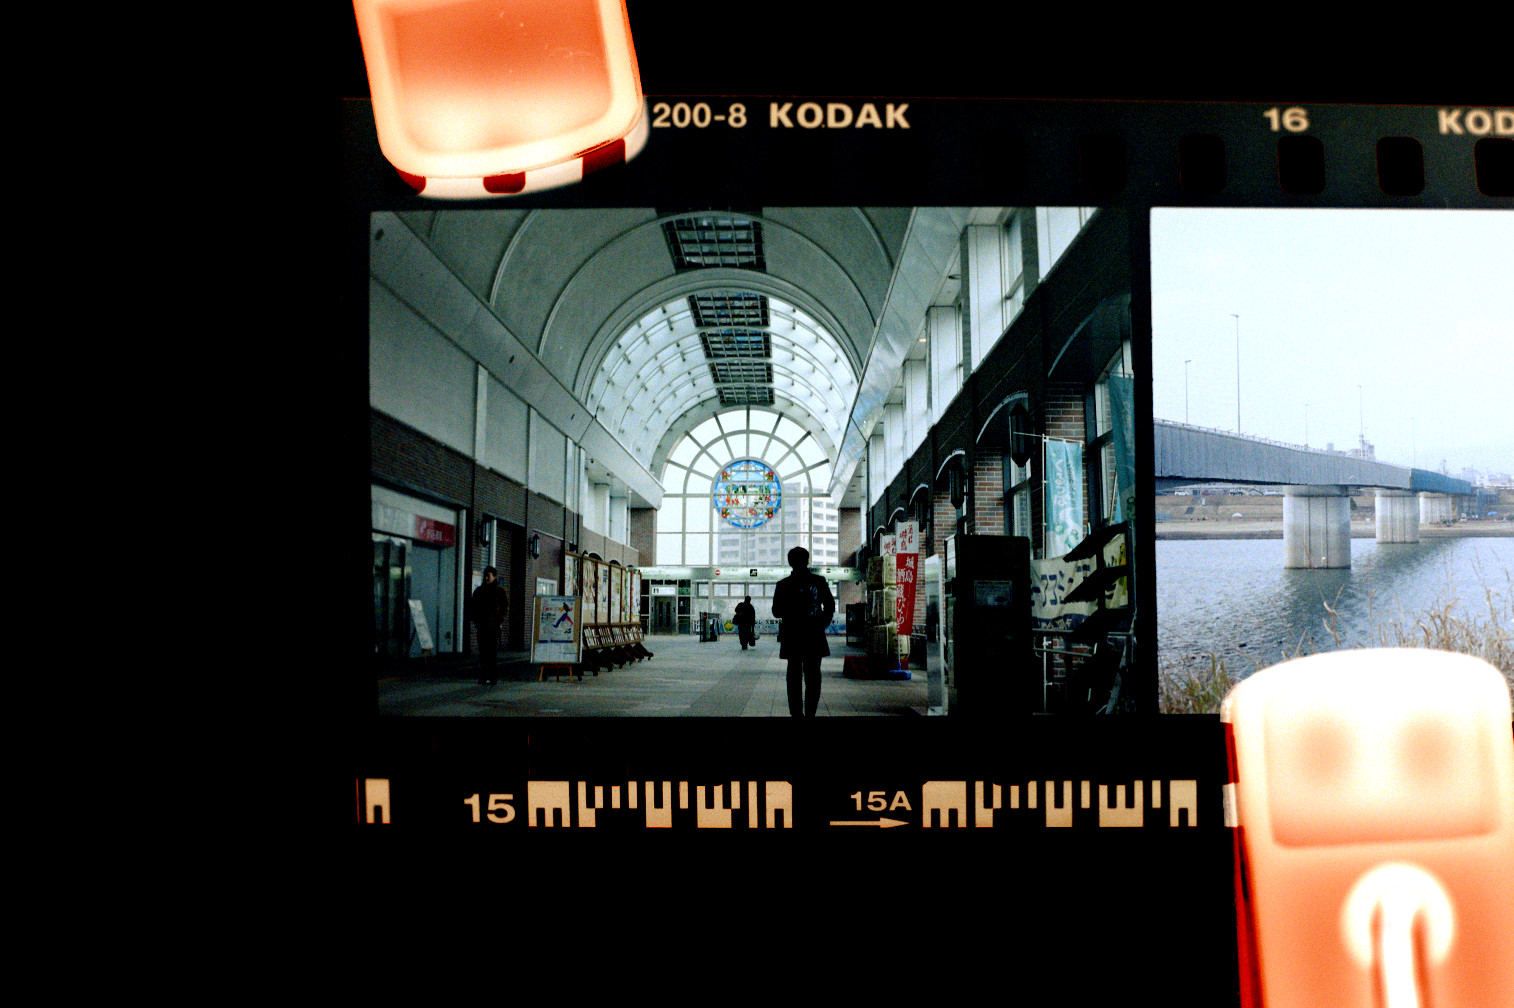
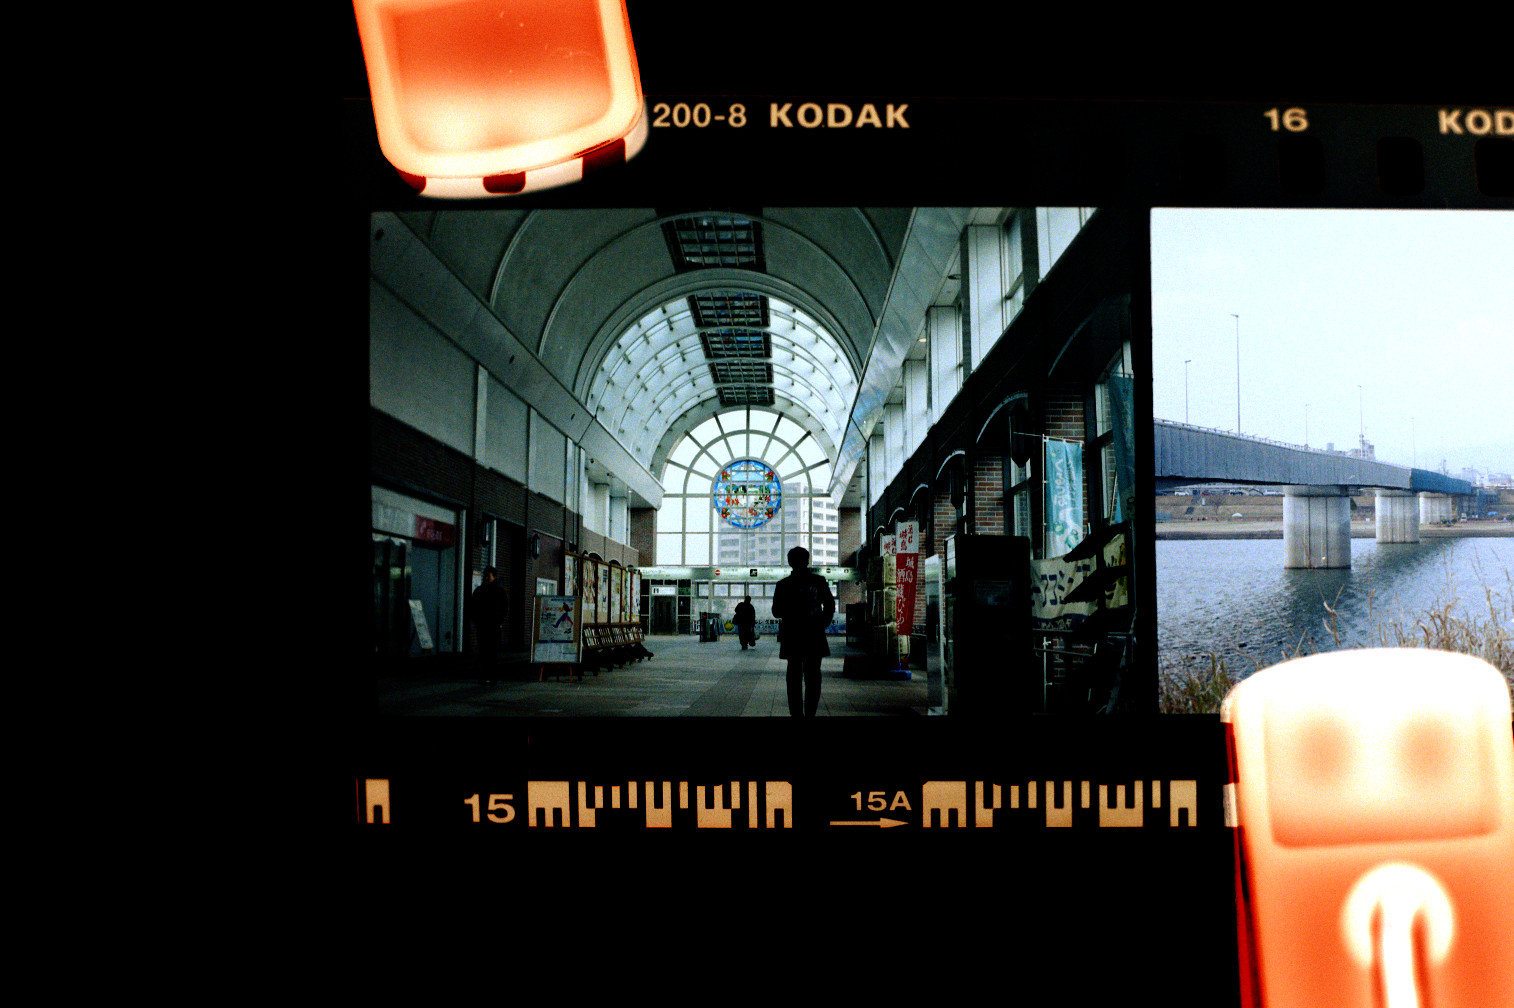
下記にはカメラ屋さんによるスキャンと、実際のフィルムのネガです。
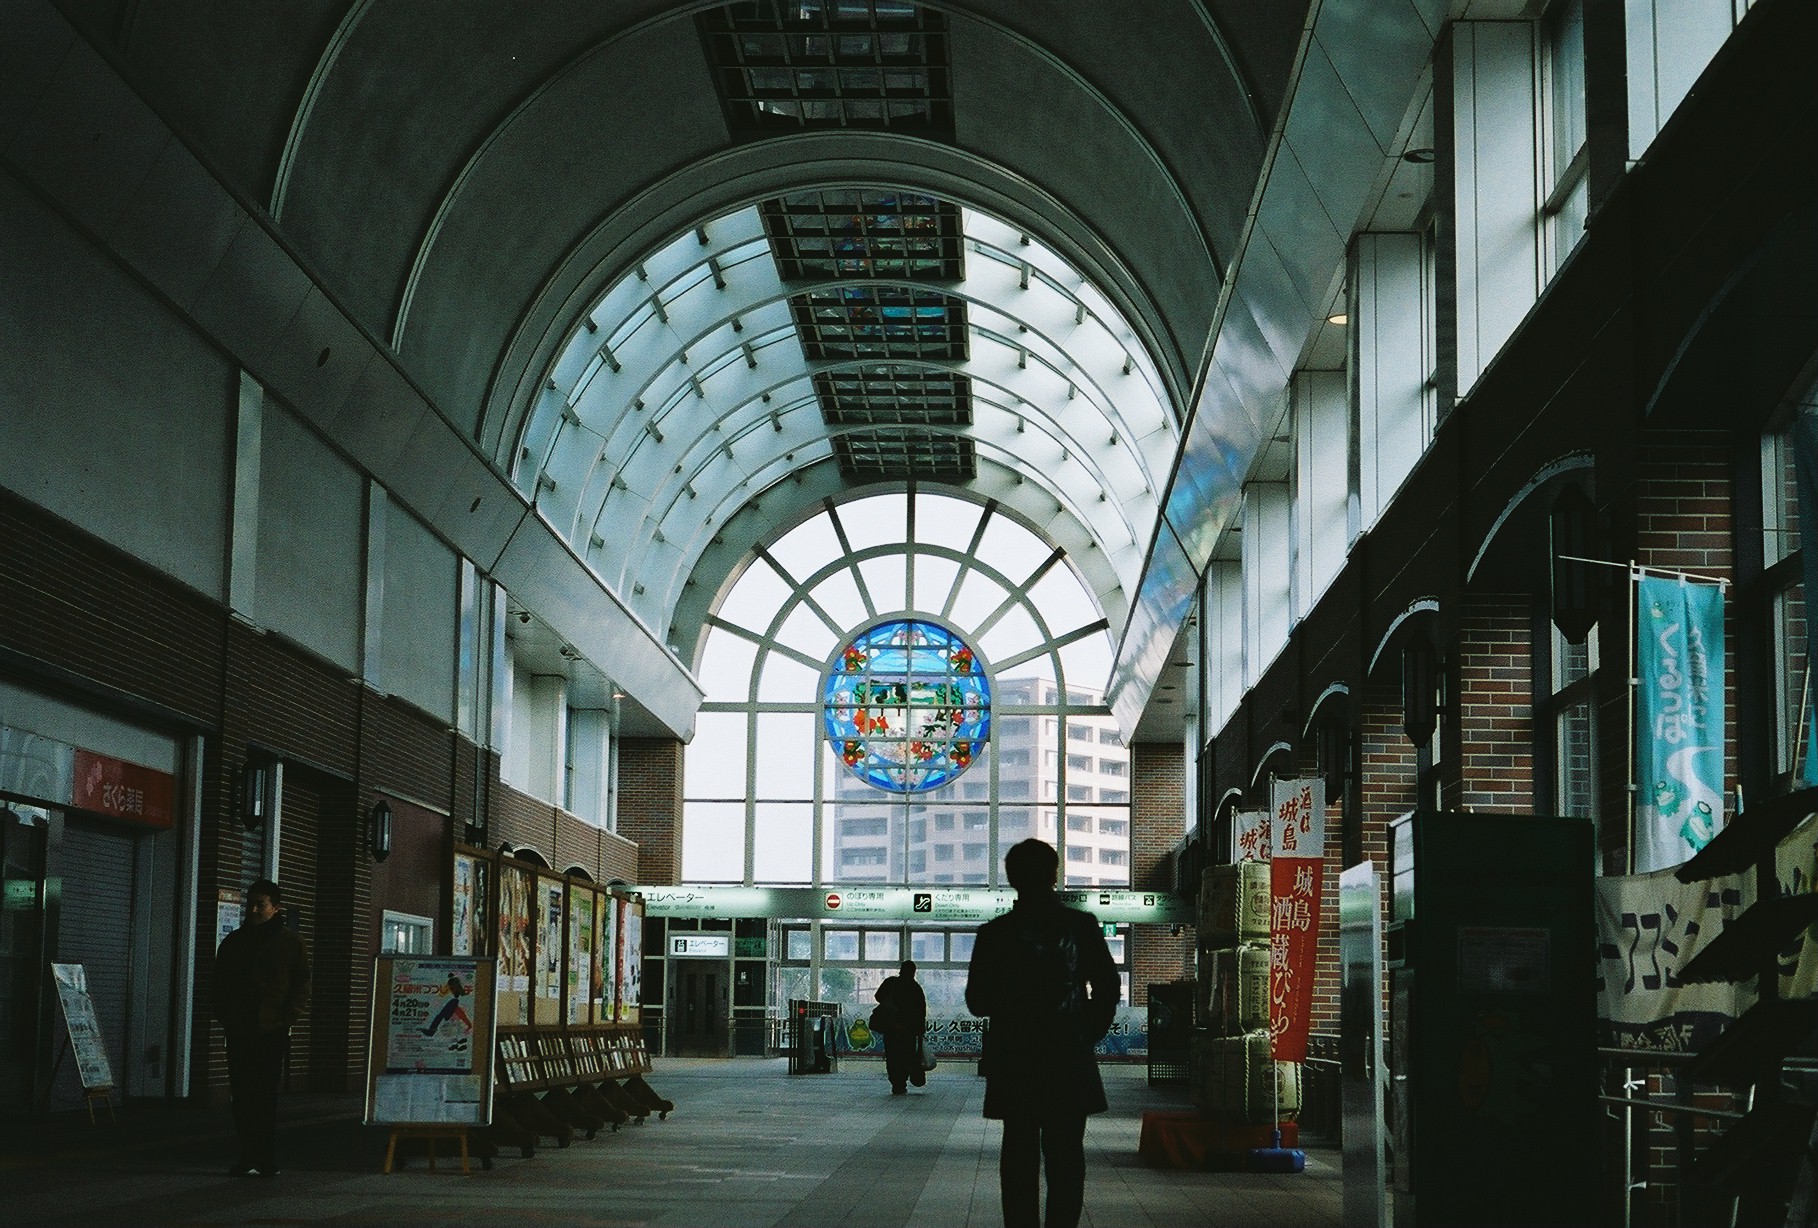
なんてこった!めちゃくちゃ黄色で光の明・暗が逆になっているんじゃないか!
これがどうなっているのか、どうやってちゃんとした写真になるのか?
本記事では撮影済みのフィルムから現像済みのネガになる流れは省力させていただきますが、ネガから使える写真をどうやって得るのかを詳しく見ておきたいです。
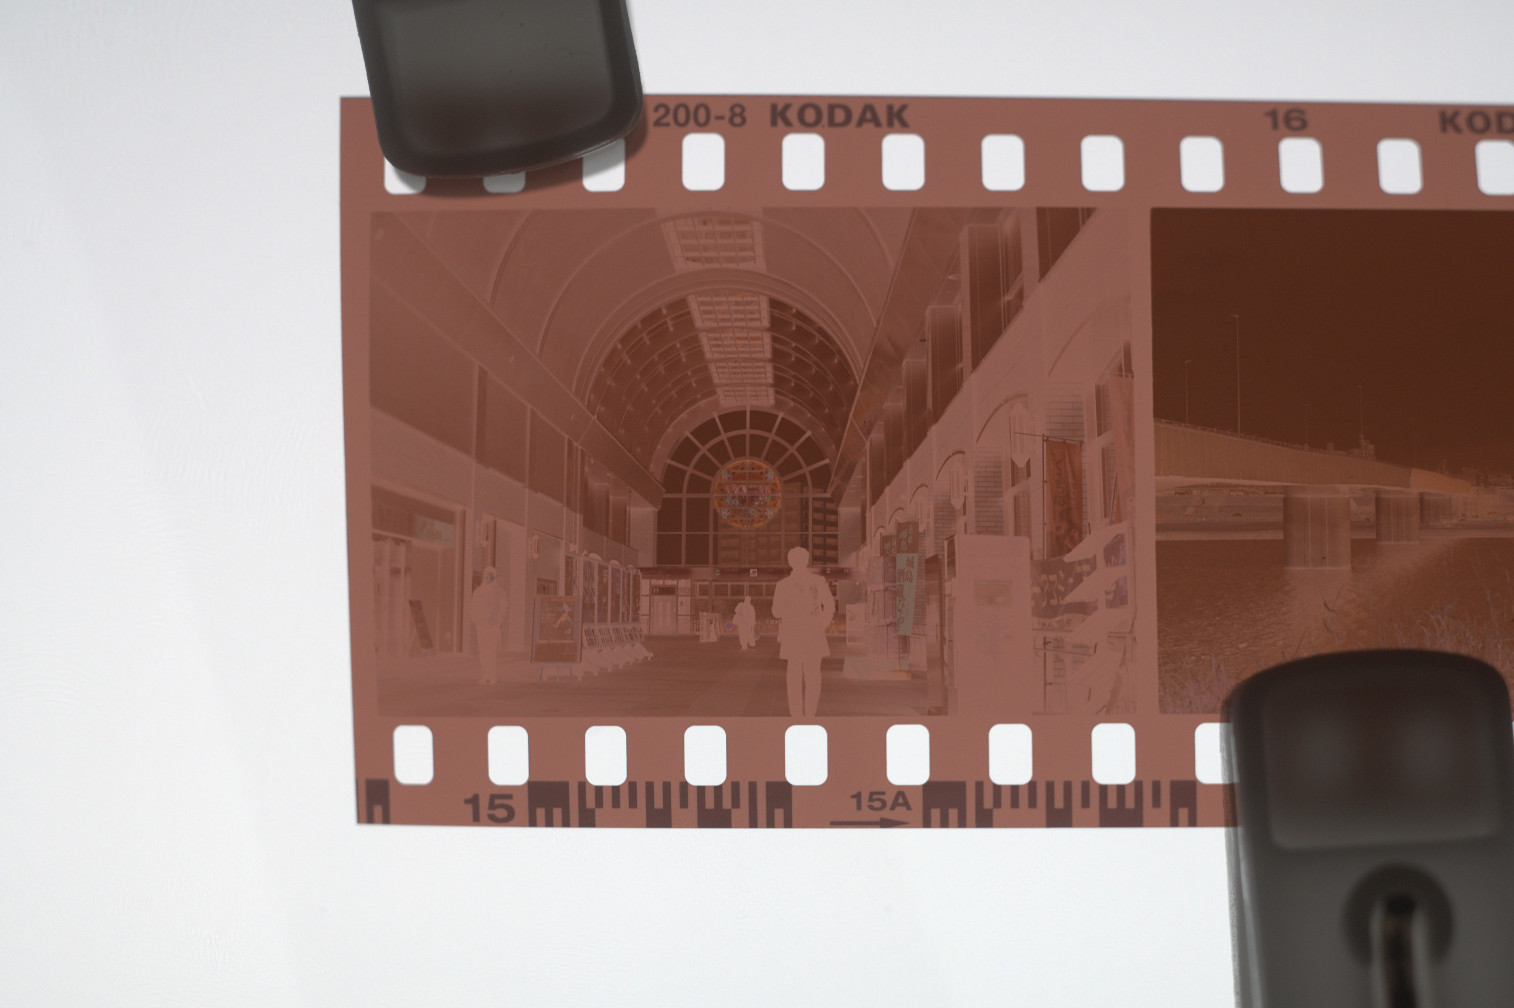
ではまず色を反転してみて、一番目立っている問題を解決してみましょう。
しかしまあ、まだ望まれるほどの結果はえられず・・・
結構全体的に青がかっているし本来の見え方とは違いますよね。
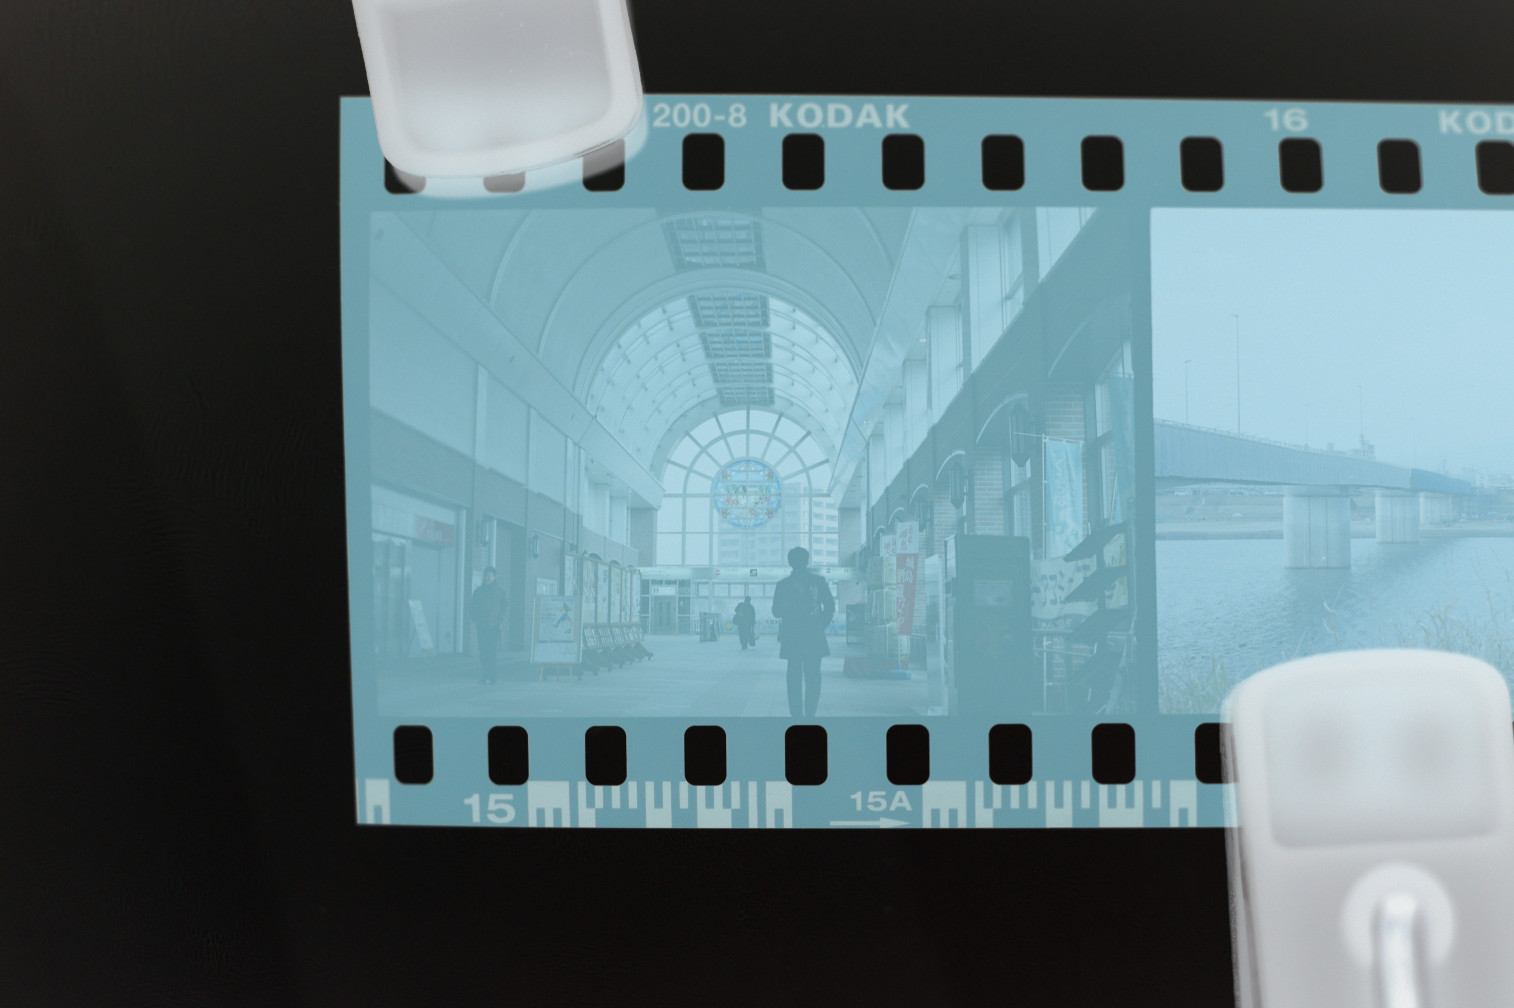
実はフィルムは「ベース色」というのがあって、未露出の端の部分で見えます。
そのベース色を除算すれば、望んでいる画像が出てくるのではないでしょうか。
これで少し近づけることができたけど、まだまだです。
青っぽいのがなくなったけど、露出アンダー的な見た目にはなっています。
フィルムは露出計によって正しく露出されているけど、どういう問題なのかな?
これからは以下の2つのことに対応し補正しなければいけない:
- フィルムのデジタル化に使用されたカメラもしくはスキャナーの露出設定
- フィルムの露出(濃度)
もしスキャンではなくプリントの場合でも後者を考慮する必要があります。
フィルムの粒子が光に反応するため、光によって太さ(濃度)が異なります。
どの濃度が画面・紙の完全白色に当たるかは客観的なことです。
それを踏まえて、これらの点を対応に調整してみましょう。
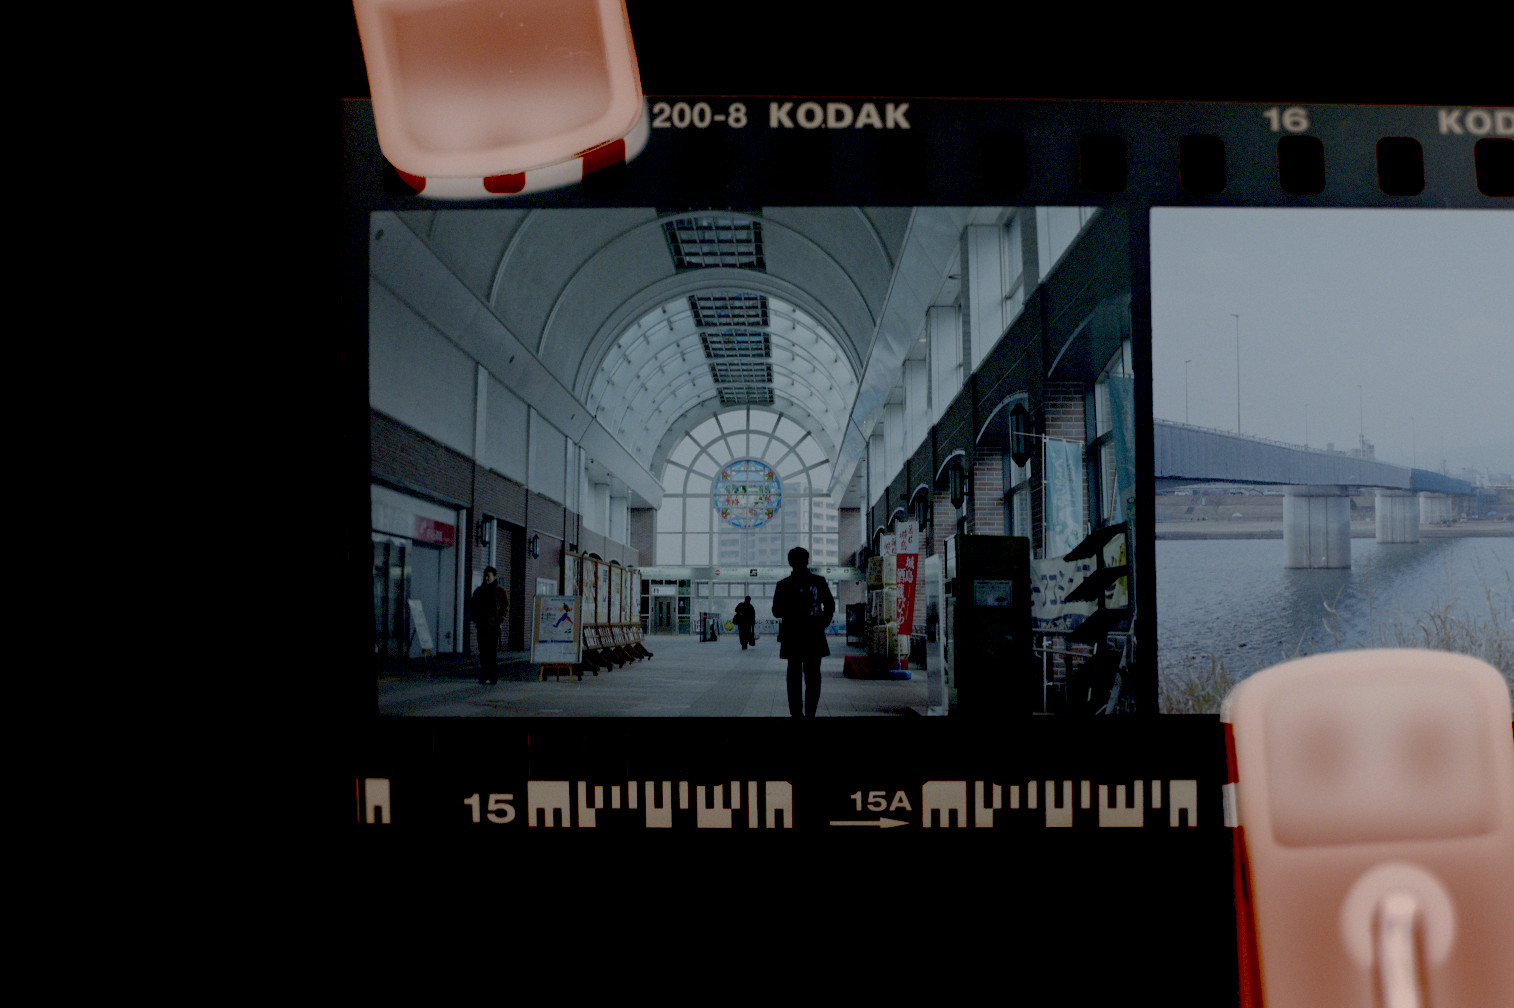
レベルツールを使ってホワイトポイントを画像の一番明るいはずの明度(空)に合わせてみましょう。
これで露出アンダーな見た目になっていた問題が解消されまして、一番明るい箇所がちゃんと明るく見えます。
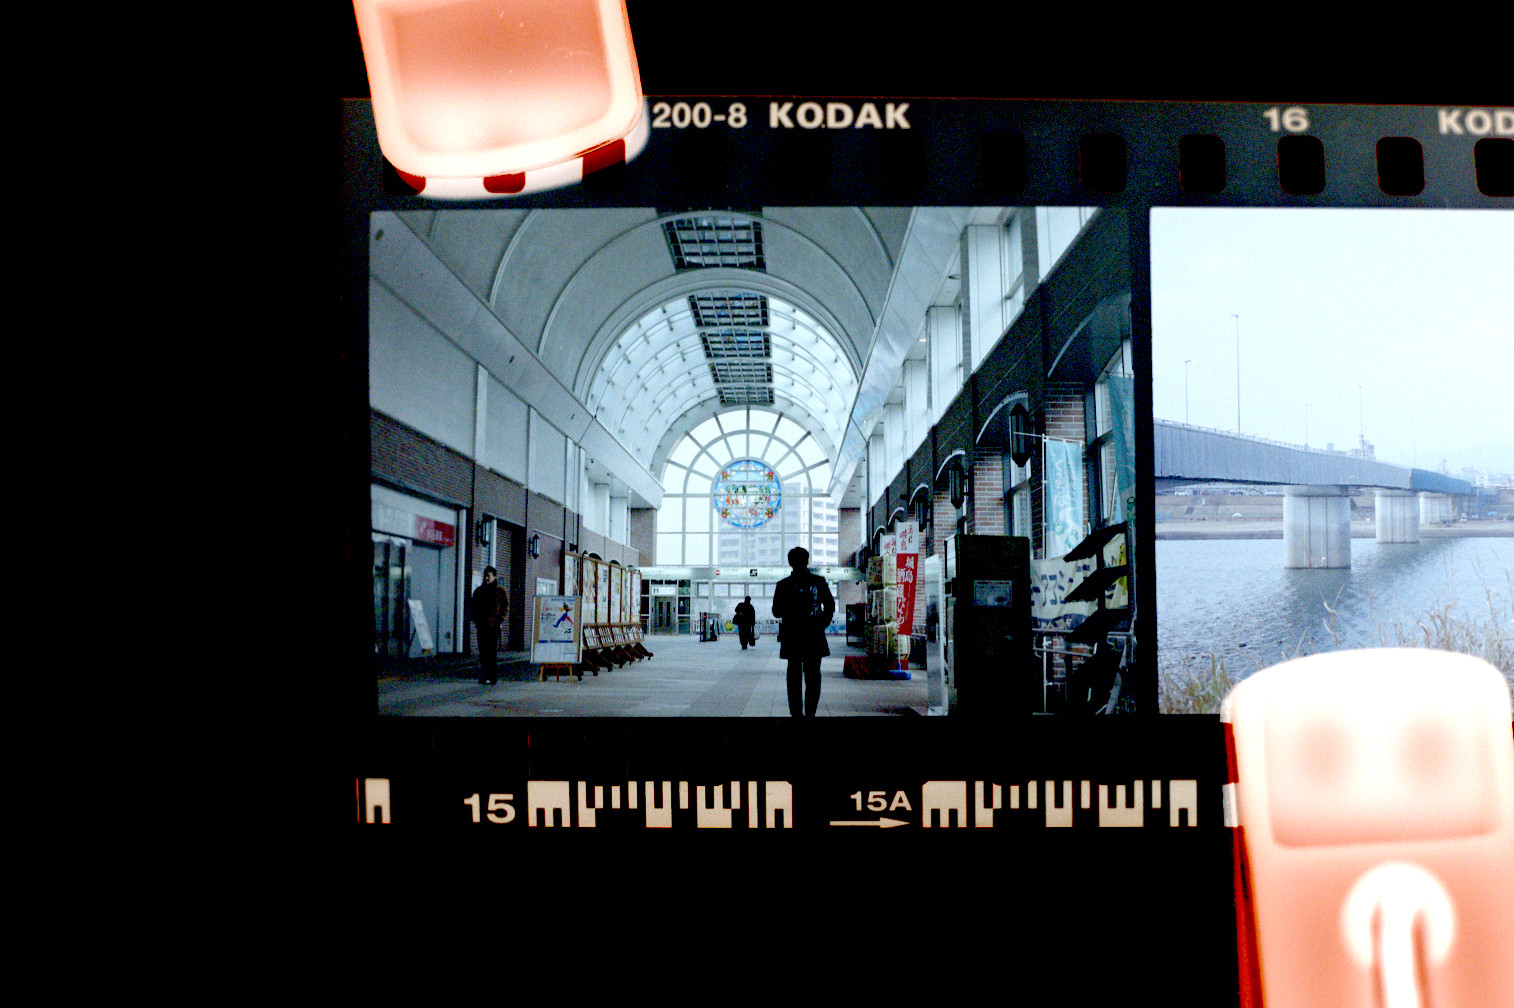
しかしながら、カメラ屋からのスキャンと比べると明度の階調が柔らかい印象ですね。
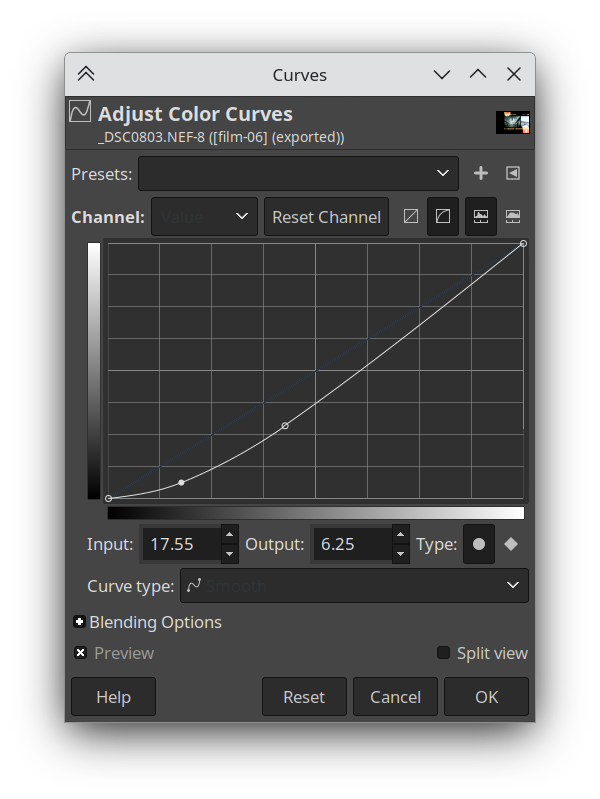
カーブを適用して、コントラストを改善してみましょう。
これで明度に関しては近いですが、色合いにはやはりまだ差異が残っています。
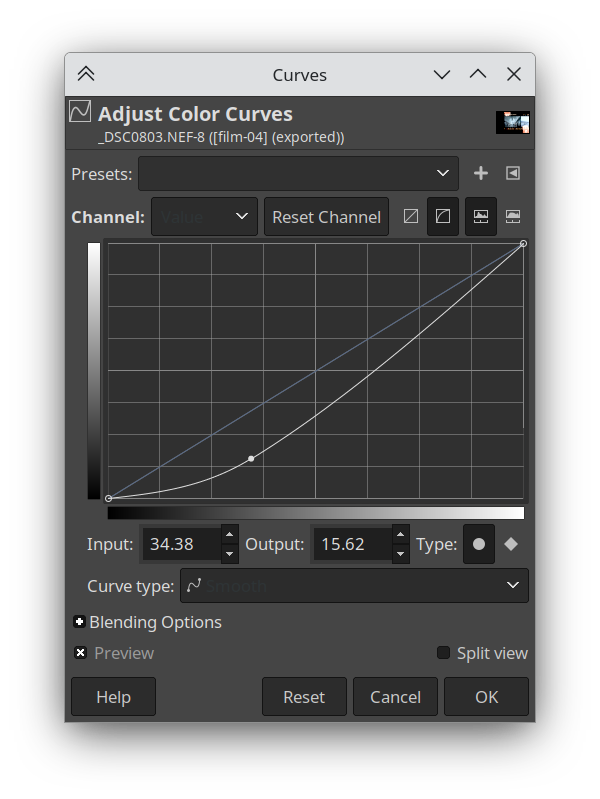
ベース色は除算したが、まだ少し青っぽい印象が残っています。
例えばレンガの赤の部分が、くすんで見えます。
各色チャンネルを調整してより自然な印象を目指してみましょう。
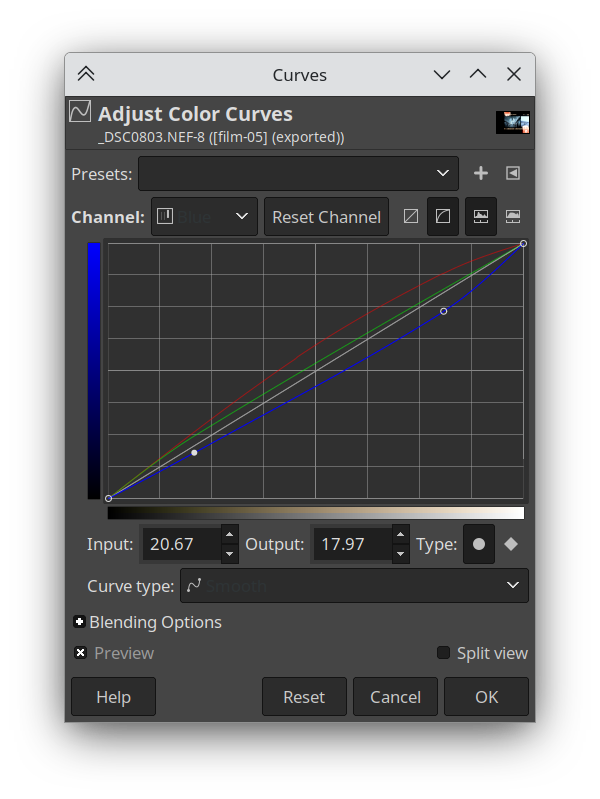
これでより自然な印象になりまして、カメラ屋のスキャンとかなり近づいてきたと思います!
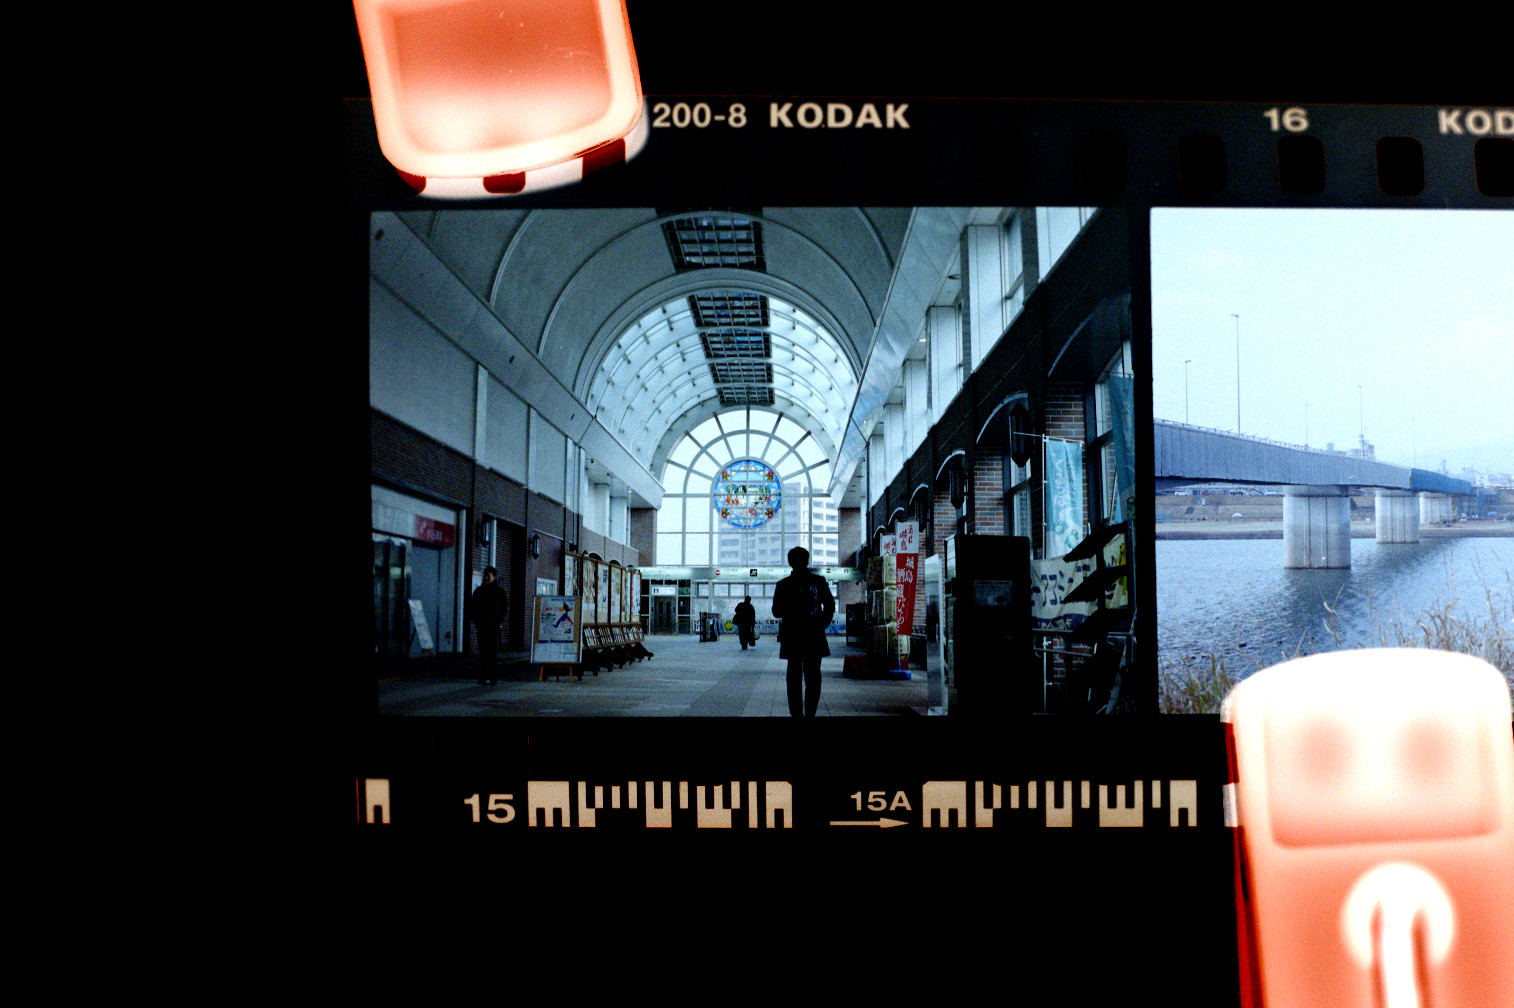
暗いところまだ少しコントラストが足りないので、もう少し明度カーブの調整を入れてみます。
そして最終的にカメラ屋由来のスキャンと比べてみます。
大成功!!かな?実際はカメラ屋のスキャンに合わせることが出来たとはいえ、カメラ屋では元々どうやってこの画像を得たのかな?
実は特定のフィルムが一つだけの正しい見た目を持っているわけではなく、スキャン方法などによっては複数の可能性があるのです。
写真一枚一枚にもよるし、フィルム種類にもよります。
例えばホワイトバランスという点のみ考慮しても、ほとんどの市販フィルムは5200k(昼間)もしくは3200k(タングステン)のどちらかを前提にしています。撮影されたシーンはそのどちらかに完全に当てはまらない場合は、色がずれていって調整の必要性が出てきます。
色温度調整はフィルムのスキャンだけでなくプリントの場合でも不可欠な手続きと言えます。
スキャン・プリントいずれでも、この調整はソフトのアルゴリズムもしくはカメラ屋さんの主観的な手作業のどちらかによって影響を受けることになります。
すべては主観的
この実験を行って最も実感したのは?フィルム写真の「正しい」見た目というのがなくて、スキャン・プリントはアルゴリズムもしくは作業者の判断によって影響を受けることです。
ではデジタル化メルのRAW撮影とはどんな関連性を持っているのか、と聞かれても不思議でもないのですが、その課題に入ったら適用される仕組みは一緒なのが説明になるでしょう。
一旦はカメラ屋さんの主観的な要素を少しだけ引き続き探検してみましょう。
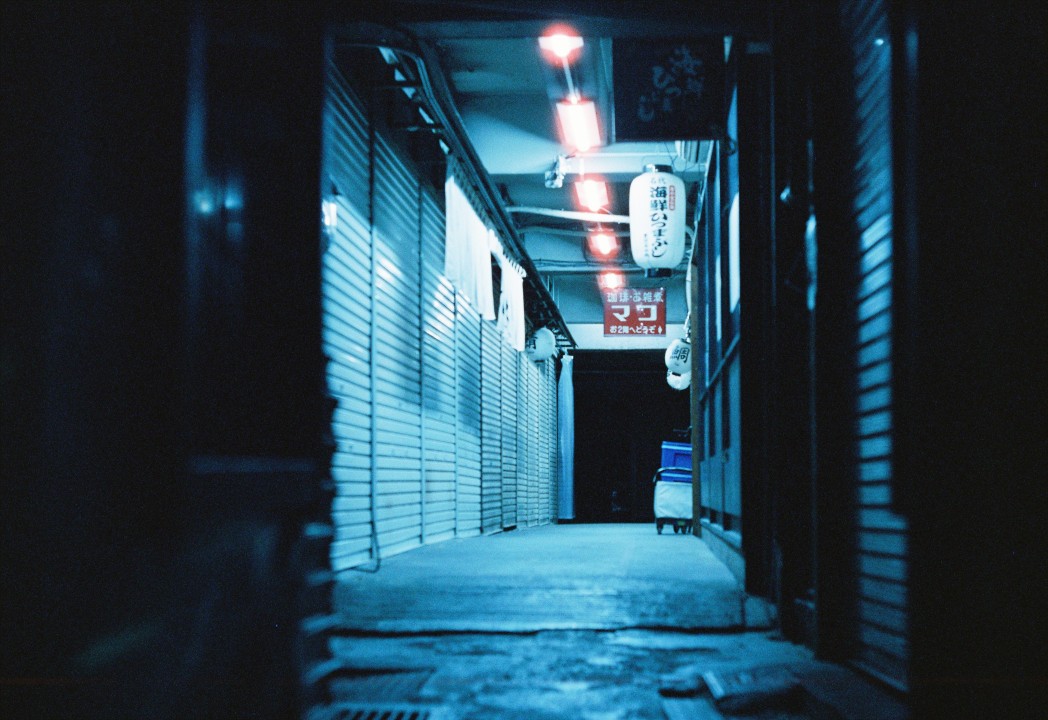
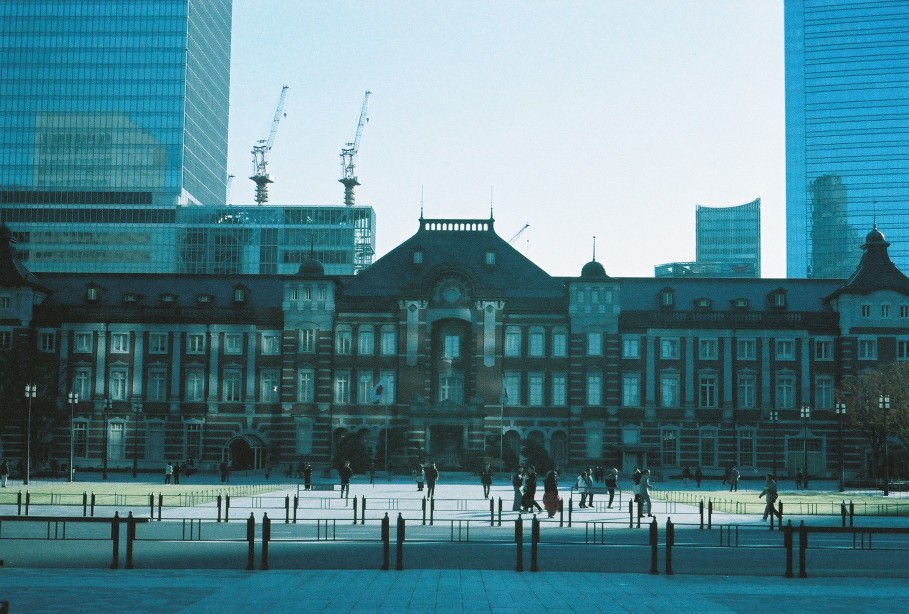
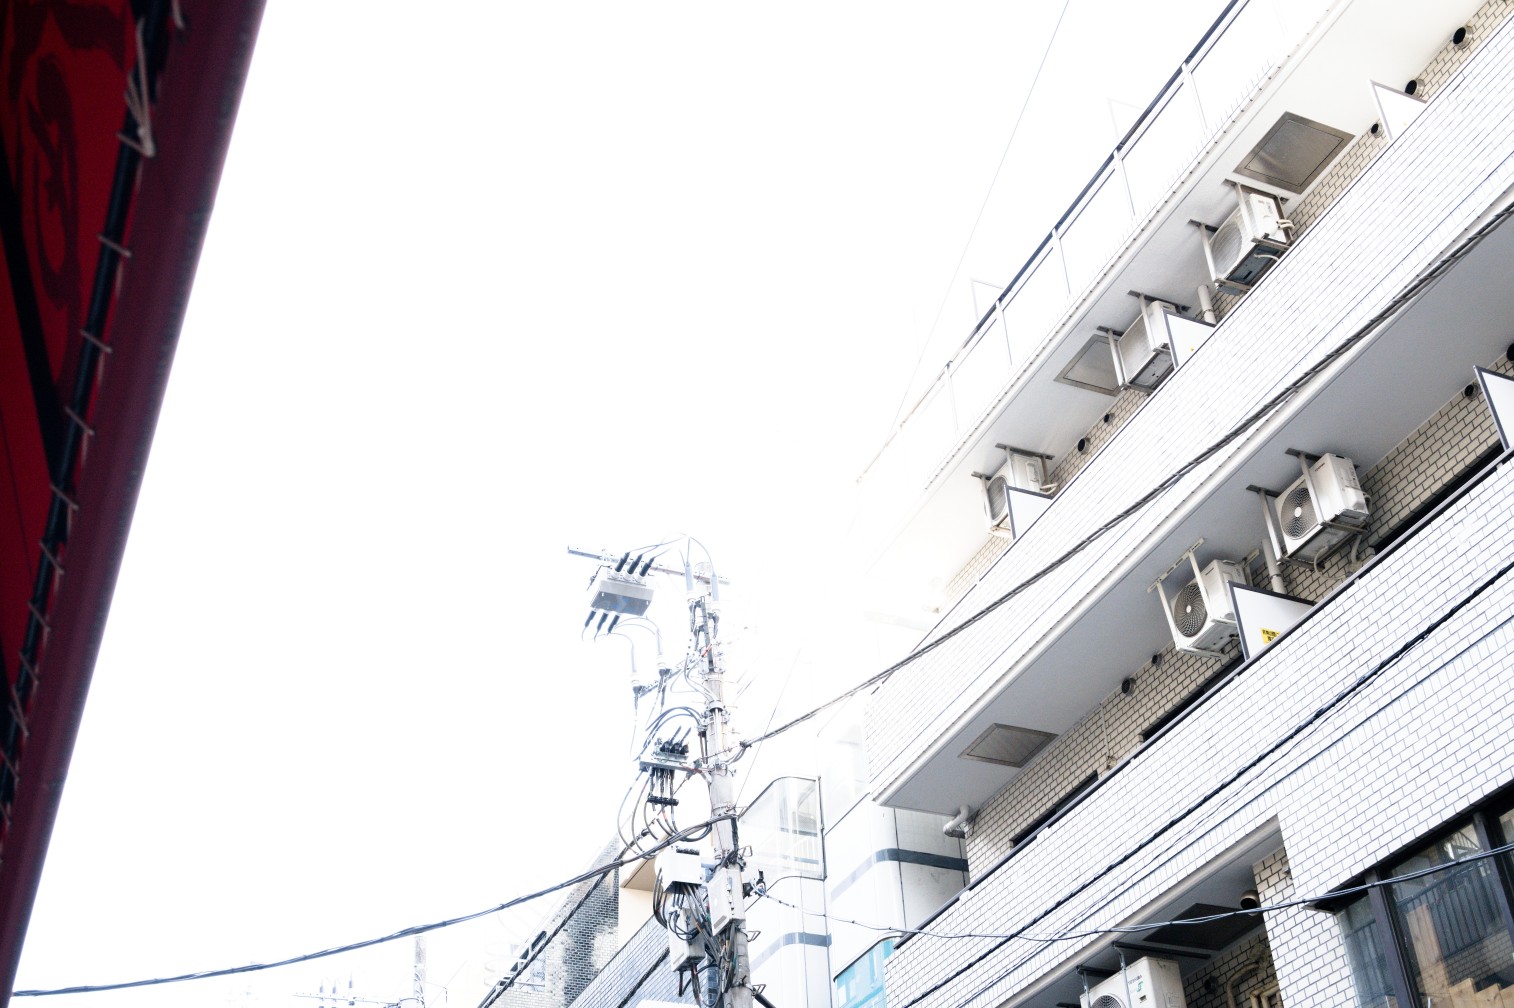
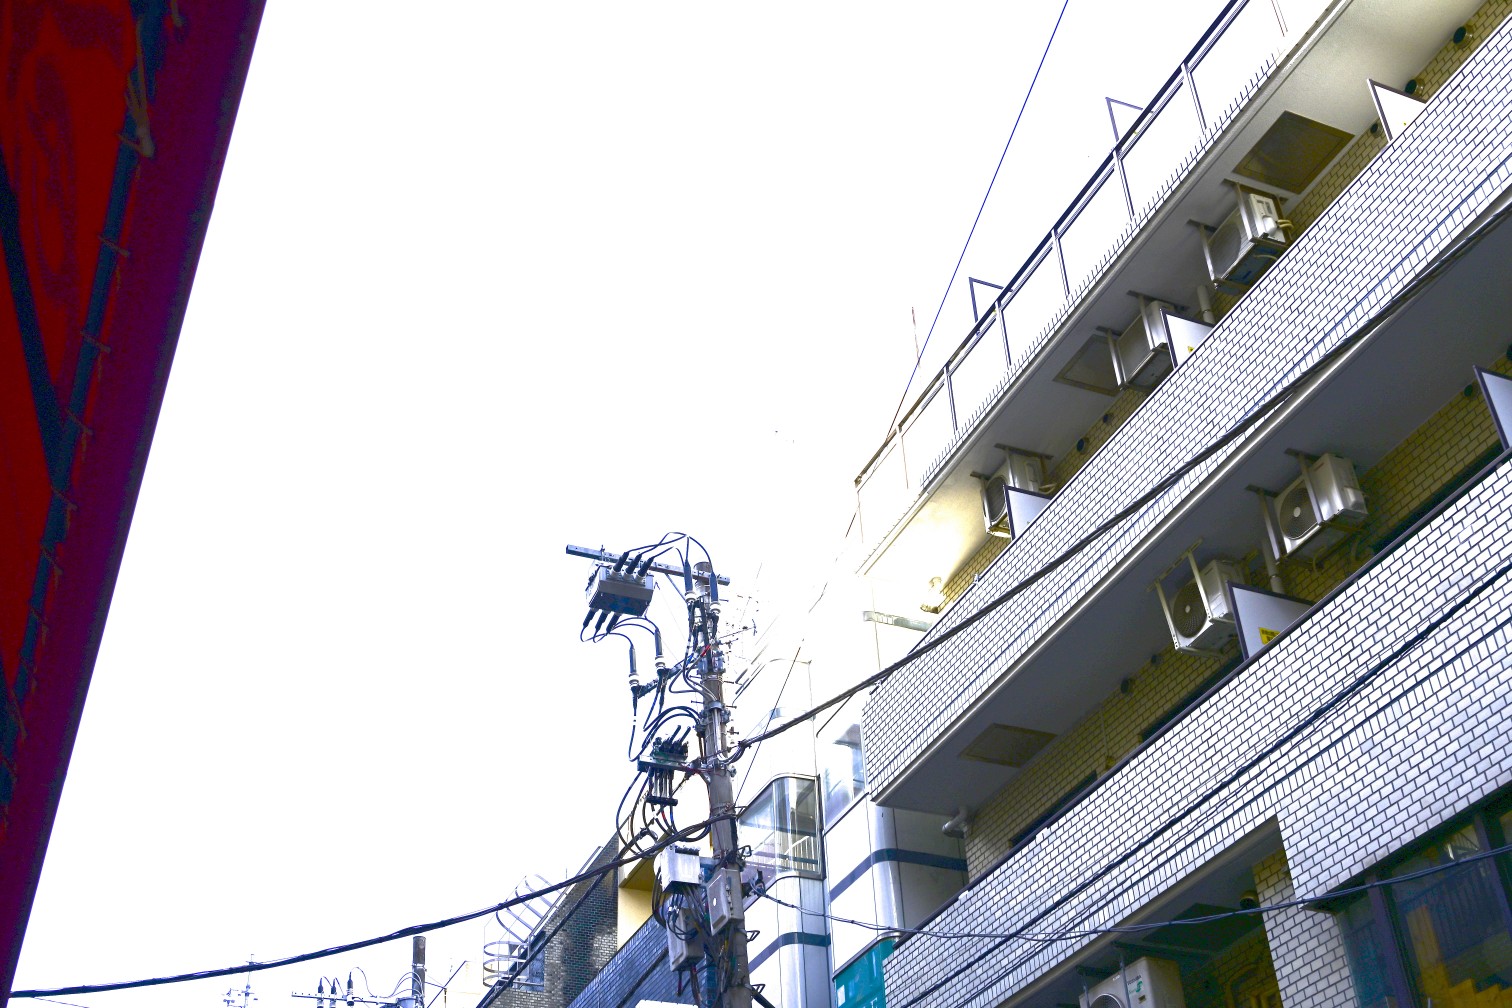
以下の写真二枚をご覧ください。現像・スキャンはそれぞれ違うカメラ屋さんで行われています。
まず目に入るのは、その青・緑がかかっている色合いではないでしょうか。
これは3200kタングステン照明前提のフィルム(Cinestill 800T)が利用されたのが原因となります。
実際にSNSでこの特徴的な見た目が流行っていて正しい見た目とされており、タングステン照明でない場面の撮影を「正しい色」に補正するための色温度調整を入れてしまったら「正しくない見た目」として捉えられてしまうことにるのではないでしょうか。
フィルムのルックは期待されているルックこそ正しい、という現象が感じられます。
では、具体的な差を確認してみましょう。
これらは完全な一対一な理想な比較ではない、というのは確かです。
完全に違う国で完全に違う場所を完全に違う照明状況で撮影されているのです。
しかしそれでも差がかなり大きく感じるのではないでしょうか。まるで違うフィルム種類になっているかのように。
上の写真はコントラストが効いていて彩度も色シフトもかなりかかっています。
下の写真は彩度が控えめで、色合いが大体自然的な感じになっています。
それに黒レベルが上げられていて影が完全に黒ではない。(その影響で粒料も目立ちます)
注意深く場合によっては手動で丁寧に調整されたのはどちらかというと、下の方なのではないでしょうか。
とはいえ、見た目は完全に間違っています。なぜかというとCinestill 800Tといえばこういう見た目じゃないからです。
期待されているのは彩度の高い緑・青に高いコントラストで不思議な空間を表現するとても個性的な描写です。
つまり、調整が細かくかかっていないノリツのスキャンプリセットの見た目が期待されるのです。1
もう一つ、より直接比べられる例です。
この場合はカメラのキタムラのスキャンが残念で、自分の品質の低いマクロレンズを使ったカメラスキャンのほうが色が正しく見えるものです。
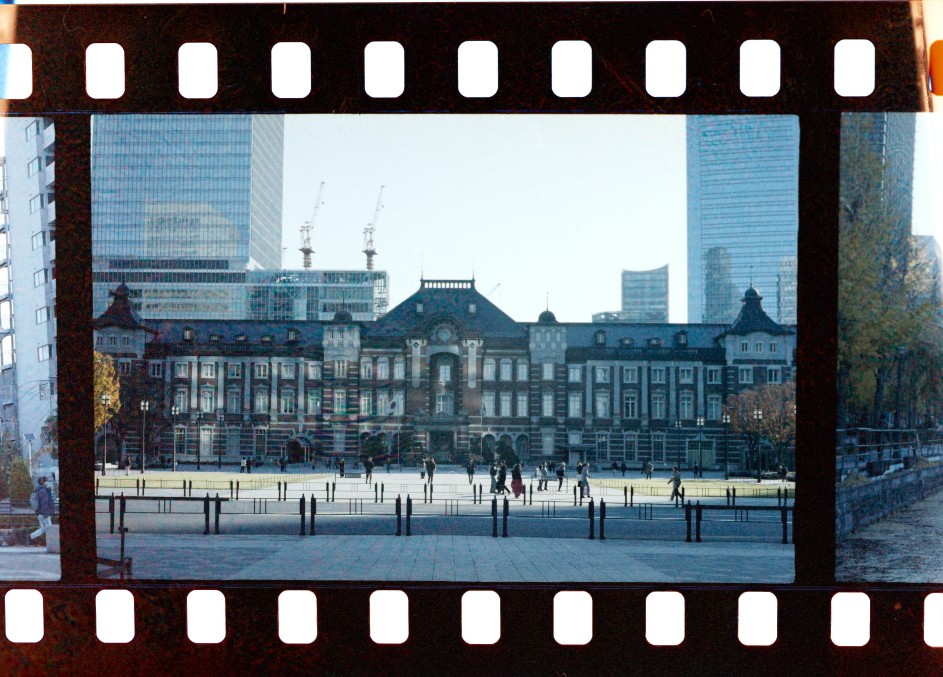
これは欲しかったフィルムがヨドバシアキバで売り切れになって代わりに買った香港製の実験的なフィルムなんですが、
上のような見た目のままのスキャンが戻ってきたときのインパクトは言わずともおわかりいただけるかと思います・・・
これはそもそも色フィルムじゃなくて緑のティントのモノクロフィルムなのでは??とも思いまして。
だけど色カーブを自分で叩き直したら見える色の種類が増えて、東京駅の煉瓦もちゃんと赤く見えるようになります。
おそらくカメラのキタムラはこのフィルムのスキャンプリセットが無く、色彩バランスやベース色が全然違う種類のフィルムのプリセットが使われたのではないでしょうか。余談ですが最近開発されたHarman Phoenixというフィルムも自分でスキャンしたほうが"普通"な見た目が得られるという 同じような問題が発生していると言われています。
RAWはなぜネガと同じようなものなのか
ここまでのフィルムのネガの解説は 写真には正しい見た目は無く常に客観的な処理の影響を受けている ということを強調しています。フィルムは光
The gist of the film negative exploration above is that photos have no canonical look and are always exposed to subjective interpretation.
Film stock simply captures waves of light, and has a non-linear response that is adjusted by the film manufacturer to result in a pleasing image. On top of this, scanning/printing film also requires some degree of interpretation. Subjectivity is built-in to each step of the pipeline.
How about digital RAWs? Digital camera sensors are also simply light capture devices, and the signal must also be interpreted.
Let's take a simple example. A JPEG image straight-out-of-camera, and RAW processed in a variety of ways.
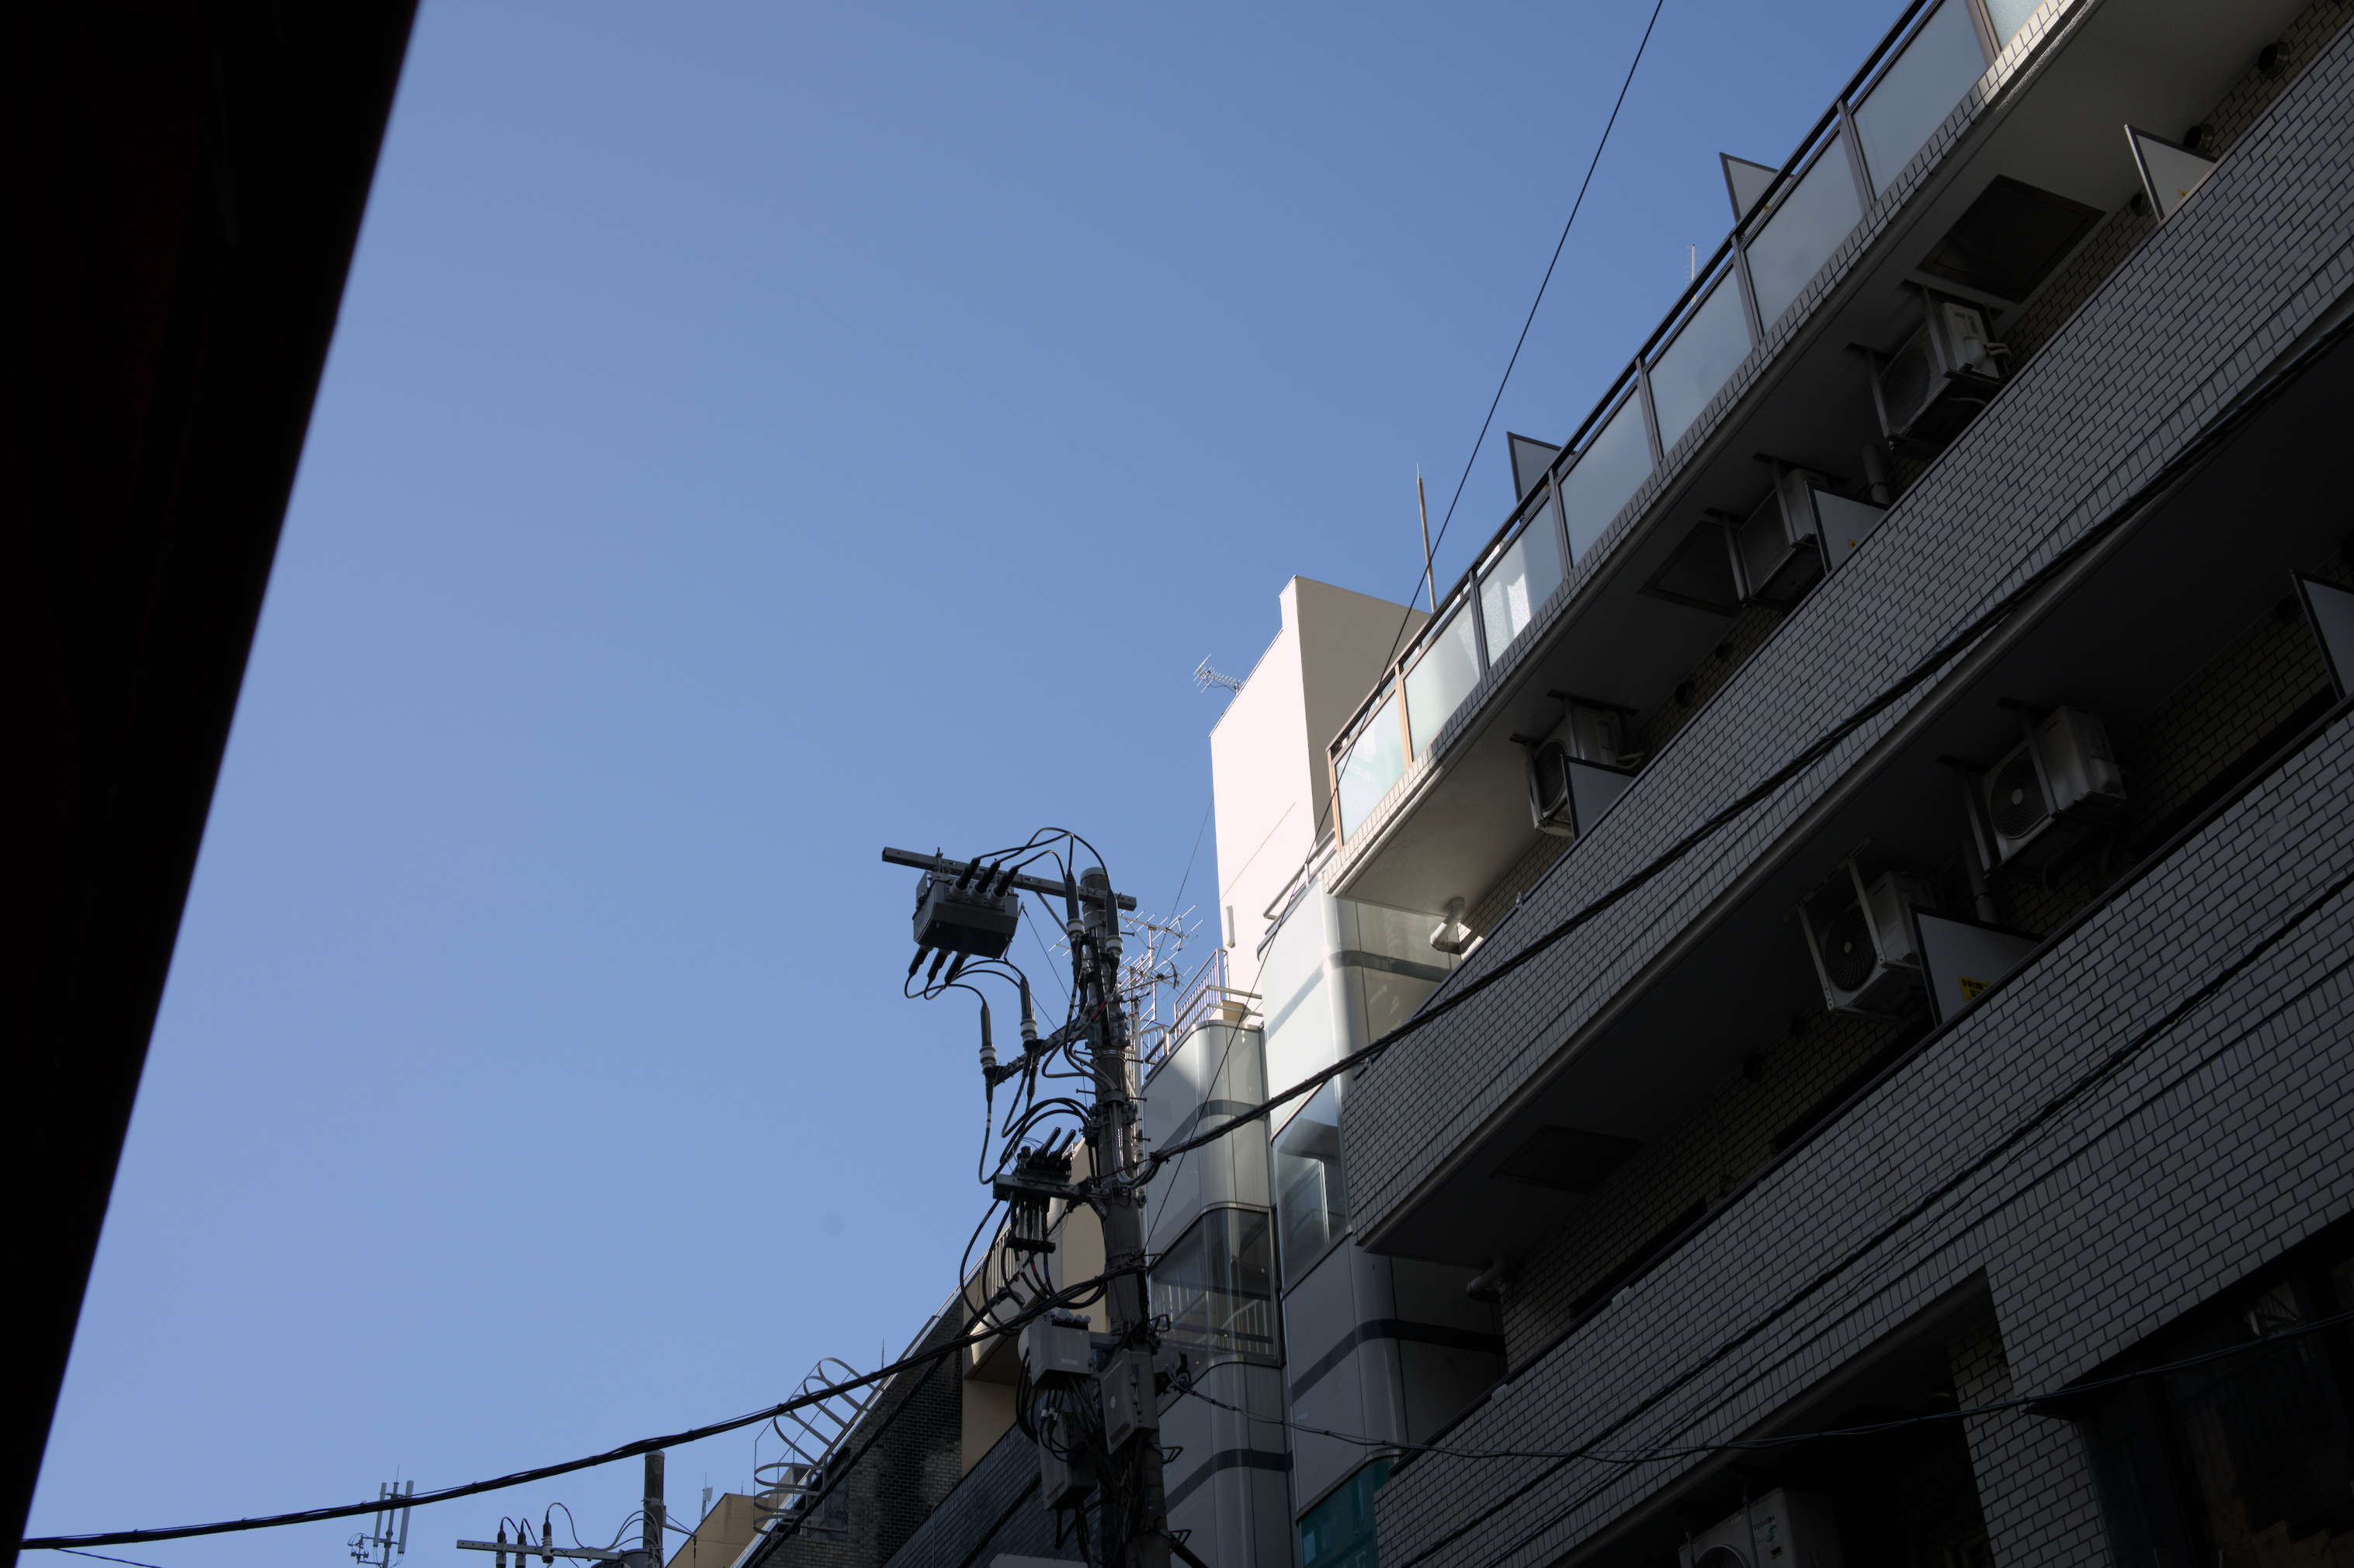

It seems just switching to RAW already gives us a different result, and on top of it we have different looks in different software! If you consider that the RAW is like a film negative, the reason behind this becomes easy to understand: a RAW photo is not in itself an image but instead the data that can be used to create an image.
What this means is that the camera itself also interprets the RAW in its own way.
In fact there are often multiple presets you can choose from like Standard/Vivid/Portrait/etc... that give you different "looks".
Fujifilm cameras go even further and call these film simulations, with each preset modeled after different film stocks.
Because cameras all have different ways of interpreting the RAW light data, you can only ensure a 100% matching result by using the camera manufacturer's official software.
Other software, including Lightroom, simply tries its best to match the results either by using pre-made camera profiles, or comparing the thumbnail JPEG embedded inside the RAW.2
We can see then that the above processed RAW images are actually not the RAW data itself, but interpretations based on it.
So what would a RAW image look like if viewed directly? The range of light values is actually quite a lot wider than can be displayed on a screen or printed on a page, so we can only really see a limited range of values. But let's try to take a look at a more raw RAW.
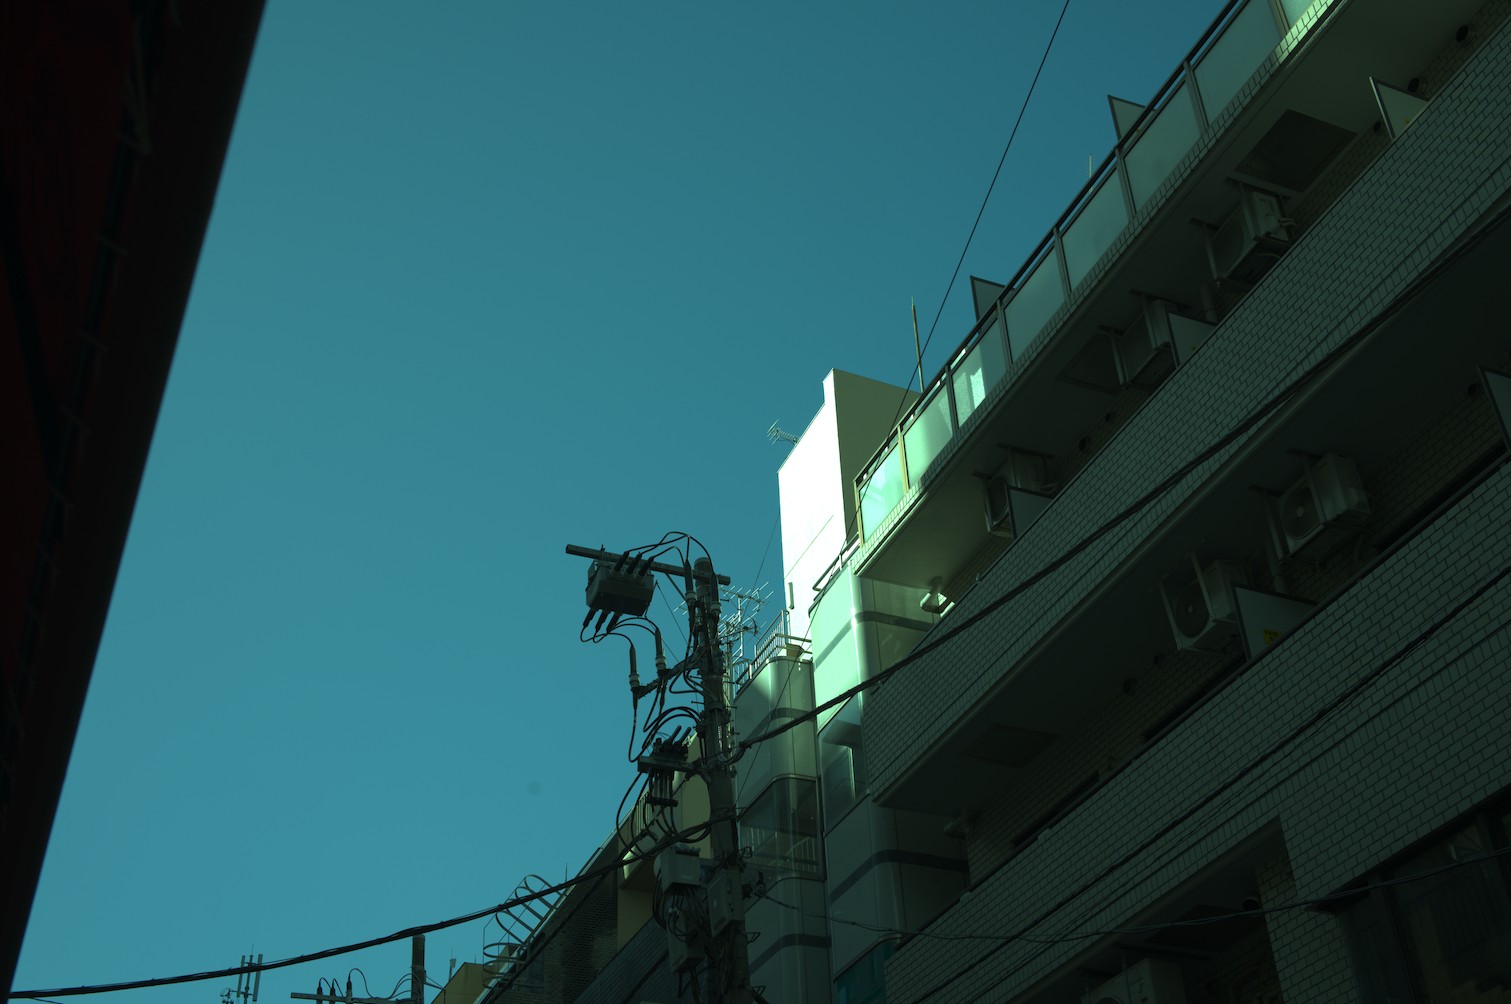
The image appears quite flat with clipped highlights, and the colours are rather green-ish.
Indeed there is no white balance applied whatsoever, and the wide range of values is allowed to exceed 100% pixel brightness.
But what if I told you that this still is not actually the real RAW image data?
Let's turn off the demosaic module as well and see exactly what the camera gives us.
For clarity, this is going to be a small cropped region of the image.
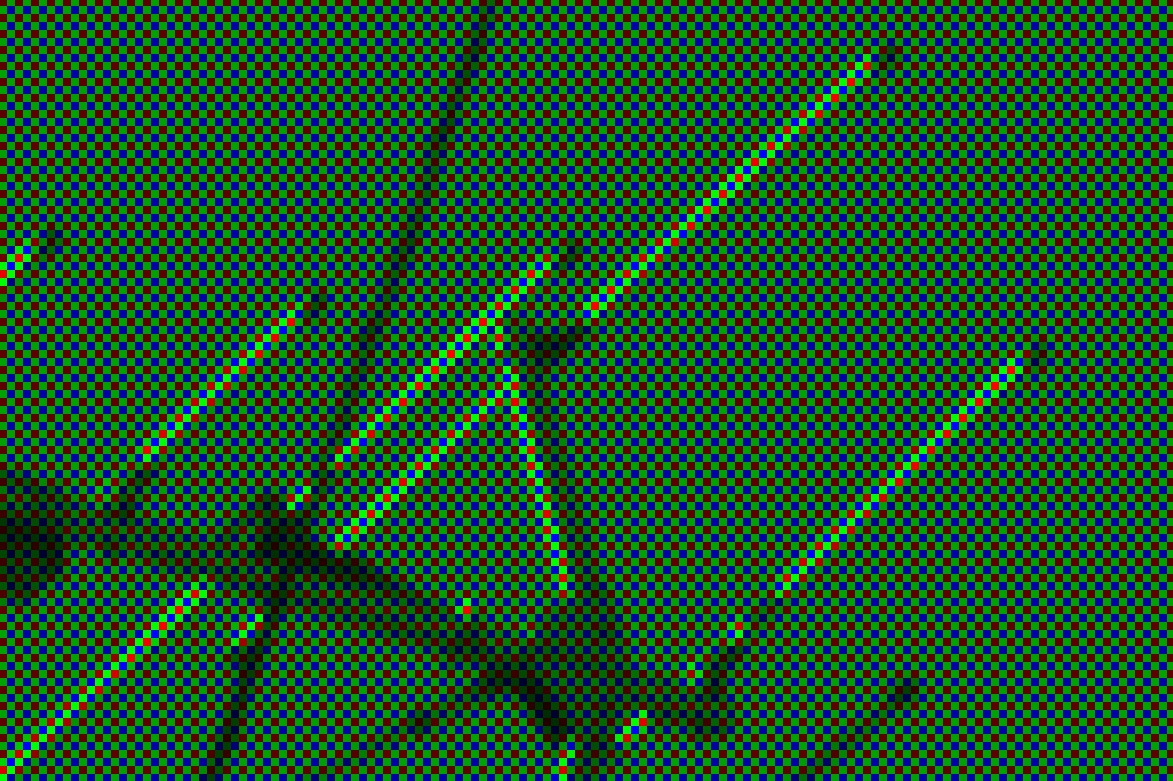
Pixels seem to not all be equal! Some pixels are only red, some only green, and some only blue.
The reason is because of how a colour sensor functions. Where film had multiple layers with red-sensitive/green-sensitive/blue-sensitive dyes, most digital cameras instead have a Colour Filter Array placed on top of a monochrome sensor. These filters let in only a segment of the light spectrum.
The implication of this is that each pixel does not actually have all the colours! In fact there are twice as many green pixels as red/blue pixels, because the human eye is more sensitive to green light.
All of this means that software to develop RAW actually need to do a whole host of things in order to obtain a usable image, let alone a pleasant image. The actual process is something like this:
- Demosaic the RAW image, to fill in the "missing" colours in each pixel.
- Adjust the colour balance.
- Apply a curve to the image, to fit the wide range of values to the dynamic range of a computer monitor.
RAW data includes metadata for the software to know in what pattern the pixel colours are arranged, how to convert the colour space, and what the colour balance was when the photo was taken.
The software can use this data, or not use it, and the user can fully control every step of the RAW development process.
Wide dynamic range
You may ask what the point of taking a step back and interpreting the photo from RAW data, rather than simply adjusting the JPEG photo from the camera.
Other than the obvious fact of avoiding applying JPEG compression multiple times losing detail, the main advantage is dynamic range.
Regular computer monitors3 use the sRGB display standard, which uses 8-bits-per-channel giving a value range of 0-255. 0 meaning as dark as the monitor can display, and 255 meaning as bright.
RAW data from a digital camera on the other hand is commonly 12-bits or 16-bits, meaning a range of 4096 values or even 65536 values!
Because the camera in reality records such a wide range of values, a RAW image has much more flexibility in how dramatically it can be edited.
The final image ends up with only a slice of this luminance range, so we can slide that slice up or down.
Consider the following, a highly darkened/brightened RAW image compared to the same operation on a JPEG image.
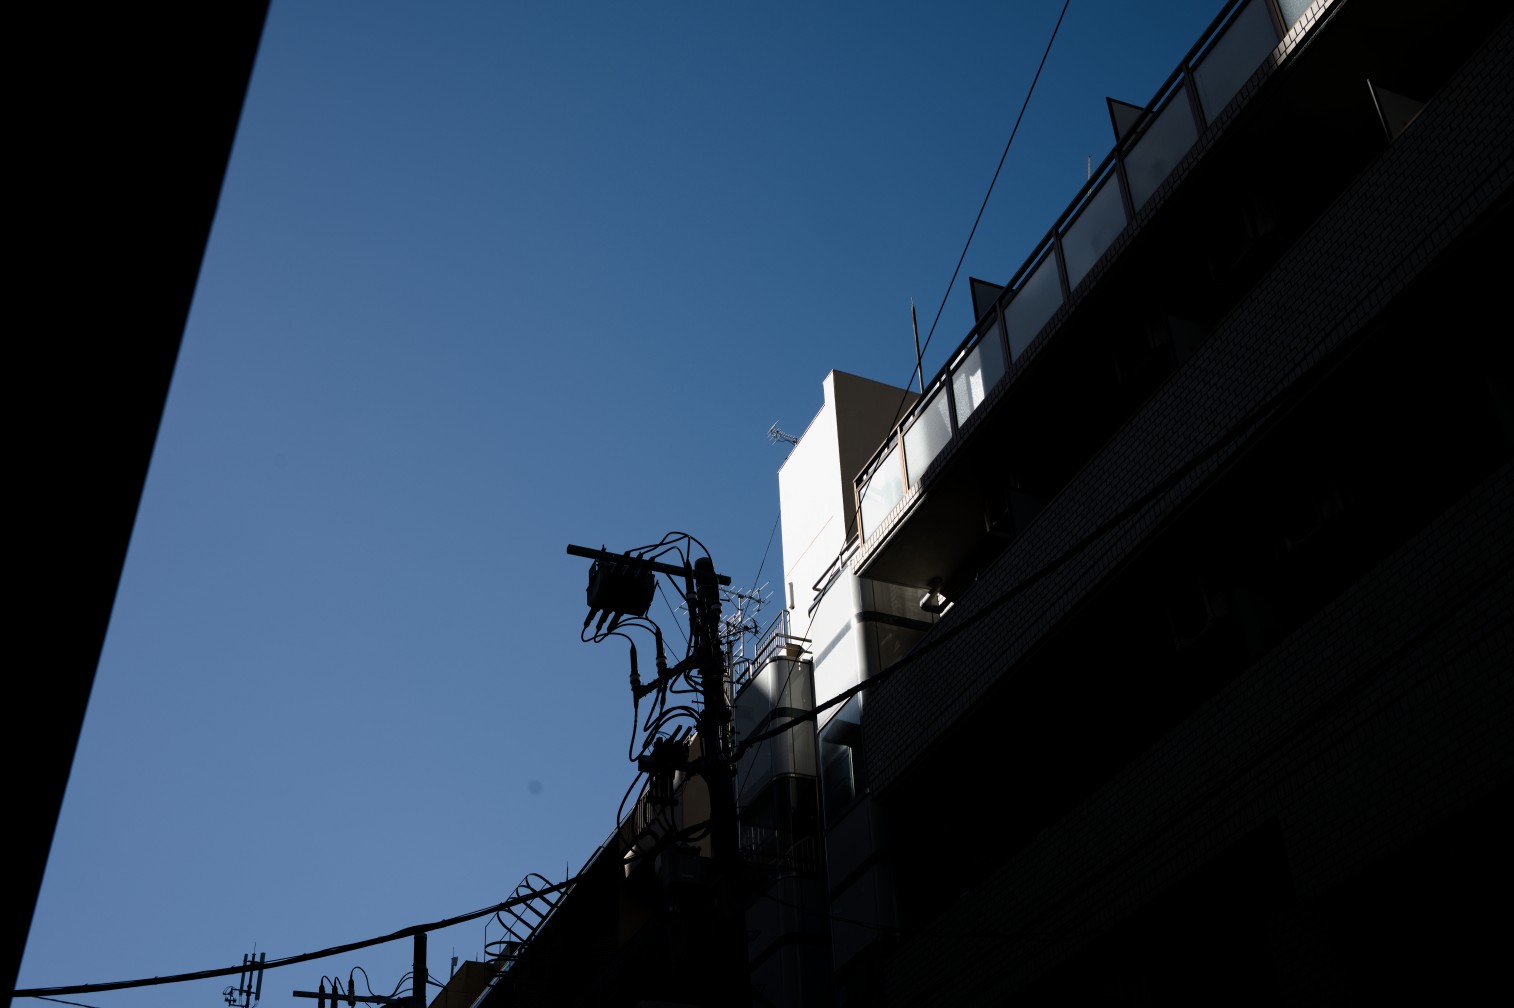

Essentially, rendering an image to be displayed on an 8-bit sRGB monitor is a destructive operation meaning information is lost. Therefore the only way to perform adjustments on a photograph without losing information, is to edit a RAW.
Conclusion
After all this, we can start to see that the concept of a non-edited photo does not really exist. The response of the sensor/film to light is already biased by human vision, and on top of it different lighting scenarios will need adjustment to look correct.
The wide dynamic range also needs to be squished down to the limited range of light that a computer monitor can display, or the limited range of dyes that a printer can print.
At all of these steps a decision is made by someone, whether that is the photographer, the lab technician responsible, or the engineer behind the algorithm.
Shooting RAW instead of JPEG allows you to control every step of the image formation process, rather than only choosing from a list of look presets that Nikon/Canon/Sony/Fujifilm have crafted.
Editing a photo is simply shifting who is responsible.
We only touched on the overall picture (pun semi-intended) of the camera-to-screen pipeline.
Stay tuned for more!
In the meantime, check out these awesome articles for more details!
The Spectral Response of Digital Cameras
Understanding Digital Raw Capture (by Adobe, PDF format)
The Life Cycle of an Image
-
Whether or not Kitamura Camera does a lot of hand-tuning, or even what brand of scanner they use, is complete guess-work on my part. I've managed to have very consistent results from three different locations of Kitamura Camera, so I assume they have a very standardized procedure with specific settings for each film stock. ↩
-
Lightroom seems to prefer the per-camera hand-tweaked profile approach, and RAWTherapee uses a bit of both but has a feature to match the value curve of the embedded thumbnail. Notably, Darktable embraces the RAW development is just an interpretation train of thought, and offers no effort to match camera JPEGs. Instead it provides a high-quality filmic tonemapper and color grading controls, in order for you to craft your own look. By default the images come out looking quite flat, ready for you to perform your artistic adjustments. ↩
-
As of 2024, HDR (high-dynamic-range) monitors are not yet the norm! If you're reading this far in the future, this may be quite different. We may end up developing the RAW photos into HDR images for HDR displays! ↩